Reducing Bugs by Using the Model View Update Pattern

Note: This article is part of the 2025 C# Advent Calendar, so after you're done reading this, keep an eye out for the other cool articles coming out this month!

For those who've followed me for a bit, you know that I'm a big believer that functional programming is a great way of approaching problems.

One thing I've mentioned in my recent presentations is that we can take introductory concepts (pure functions, immutability, composition) and build real world software with them.

In this post, I'm going to show you a pattern that I've recently ported to C#, the Model View Update, also known as The Elm Architecture.

Inspiration of the Pattern

Back in 2017, I came across a new functional language called Elm that took a different approach for web development. At a high level, Elm argues that you can think of an application as four pieces.

  1. The Model - What data are we presenting to the user?
  2. The View - How should we format the model?

At this point, this seems very similar to other MV* patterns (Model View Controller, Model View Presenter, or Model View ViewModel).

The next two parts is what sets this pattern apart from the others.

  1. The Command - What things can the user do on the screen (button clicks, entering text, etc...)
  2. The Update function - Given a Model and a Command, what does the new model look like?

To me, this is an interesting concept because when the user makes changes, the model is being directly manipulated (generally through two-way binding) and then you had to make sure that you didn't put your business rules directly in the UI code. (For those who come from WinForms, how many times did you find business code in the code-behind?).

With this approach, however, we've narrowed down what the UI can do (it can render a model and return a command, but can't directly manipulate the model).

If you think that this approach isn't solid, you might be surprised to know that Elm inspired the creation of the following libraries in the JavaScript ecosystem:

  • ngrx (Angular state management system)
  • redux (React state management system)

I've recently been using this pattern for console applications and have been pleasantly surprised how well it's working out.

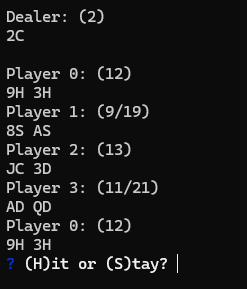
In this post, I'll walk you through how we can use this pattern to build out the "Hello World" equivalent application, manipulating a counter.

Implementing the Pattern

Defining the Command

Before we can model the Command, we need to think about what commands we want to support. In our example, let's say that we want the user to be able to do the following:

  • Increment the counter by 2
  • Decrement the counter by 1
  • Reset the counter to 0
  • Quit the application

In the Elm version (and it's equivalent TypeScript definition), a Command looks something like this:

type Command = {tag:'increment', value:2} | {tag:'decrement', value:1} | {tag:'reset'} | {tag:'quit'};

This takes advantage of algebraic data type known as a sum type, where the Command type has one of three different constructors (one called increment, another called decrement, one called reset, and finally, quit).

Even though C# doesn't have sum types (at least not yet), we can mimic this behavior using an abstract class.

1
2
3
4
5
6
7
// Abstract command that uses a string to
// denote which command it is
// (useful for casting later)
public abstract class Command<T> where T:Enum
{
  public abstract T Tag {get; }
}

Defining Commands for Counter

With the Command class defined, let's start implementing the various commands our program can have.

First, we'll define an enum to keep track of the types of Commands. We could omit this and just use strings, but the value of the enum is that we can have C# generate the cases (though we still have to have a default case given the nature of enums).

// Enum to help with exhaustive matching later
// on

public enum CommandType
{
  Increment,
  Decrement,
  Reset,
  Quit,
  Unknown
}

With the enum defined, we can start define the commands, some of which will have more information included (see the IncrementCommand and DecrementCommand).

public class IncrementCommand : Command<CommandType>
{
  public override CommandType Tag => CommandType.Increment;

  // Since some of the commands will have custom values and others not, 
  // we can inject those values through the constructor
  public int Value {get; init;}

  public IncrementCommand(int value)
  {
    Value = value;
  }
}

public class DecrementCommand : Command<CommandType>
{
  public override CommandType Tag => CommandType.Decrement;
  public int Value {get; init;}

  public DecrementCommand(int value)
  {
    Value = value;
  }
}

// In other cases, we don't need
// any other info, so we can inherit and implement the Tag property
public class ResetCommand : Command<CommandType>
{
  public override CommandType Tag => CommandType.Reset;
}

public class QuitCommand : Command<CommandType>
{
  public override CommandType Tag => CommandType.Quit;
}

public class UnknownCommand : Command<CommandType>
{
  public override CommandType Tag => CommandType.Unknown;
}

Implementing the Update Function

Now that we have our various commands created, we can start building out the Update function.

From our earlier description, we know that our Update function has to take in our model (a number) and a Command and then has to return a new model (a number).

// This example is a static method, but let's say that the rules were more complicated, 
// we could inject those into a class and make this method non-static.

public static int Update(int number, Command<CommandType> c)
{
  // I'm leveraging the new switch syntax, 
  // but you can use the original syntax
  // without issues

  return c.tag switch => {
    CommandType.Increment => number + ((IncrementCommand)c).Value,
    CommandType.Decrement => number - ((DecrementCommand)c).Value,
    CommandType.Reset => 0,
    // In the case we're told to quit or we
    // get an unknown command, we'll return
    // the model back
    CommandType.Quit => number,
    CommandType.Unknown => number,
    // Since C# doesn't have exhaustive matching, we still require the default case here
    _ => number
  };
}

Implementing the View Function

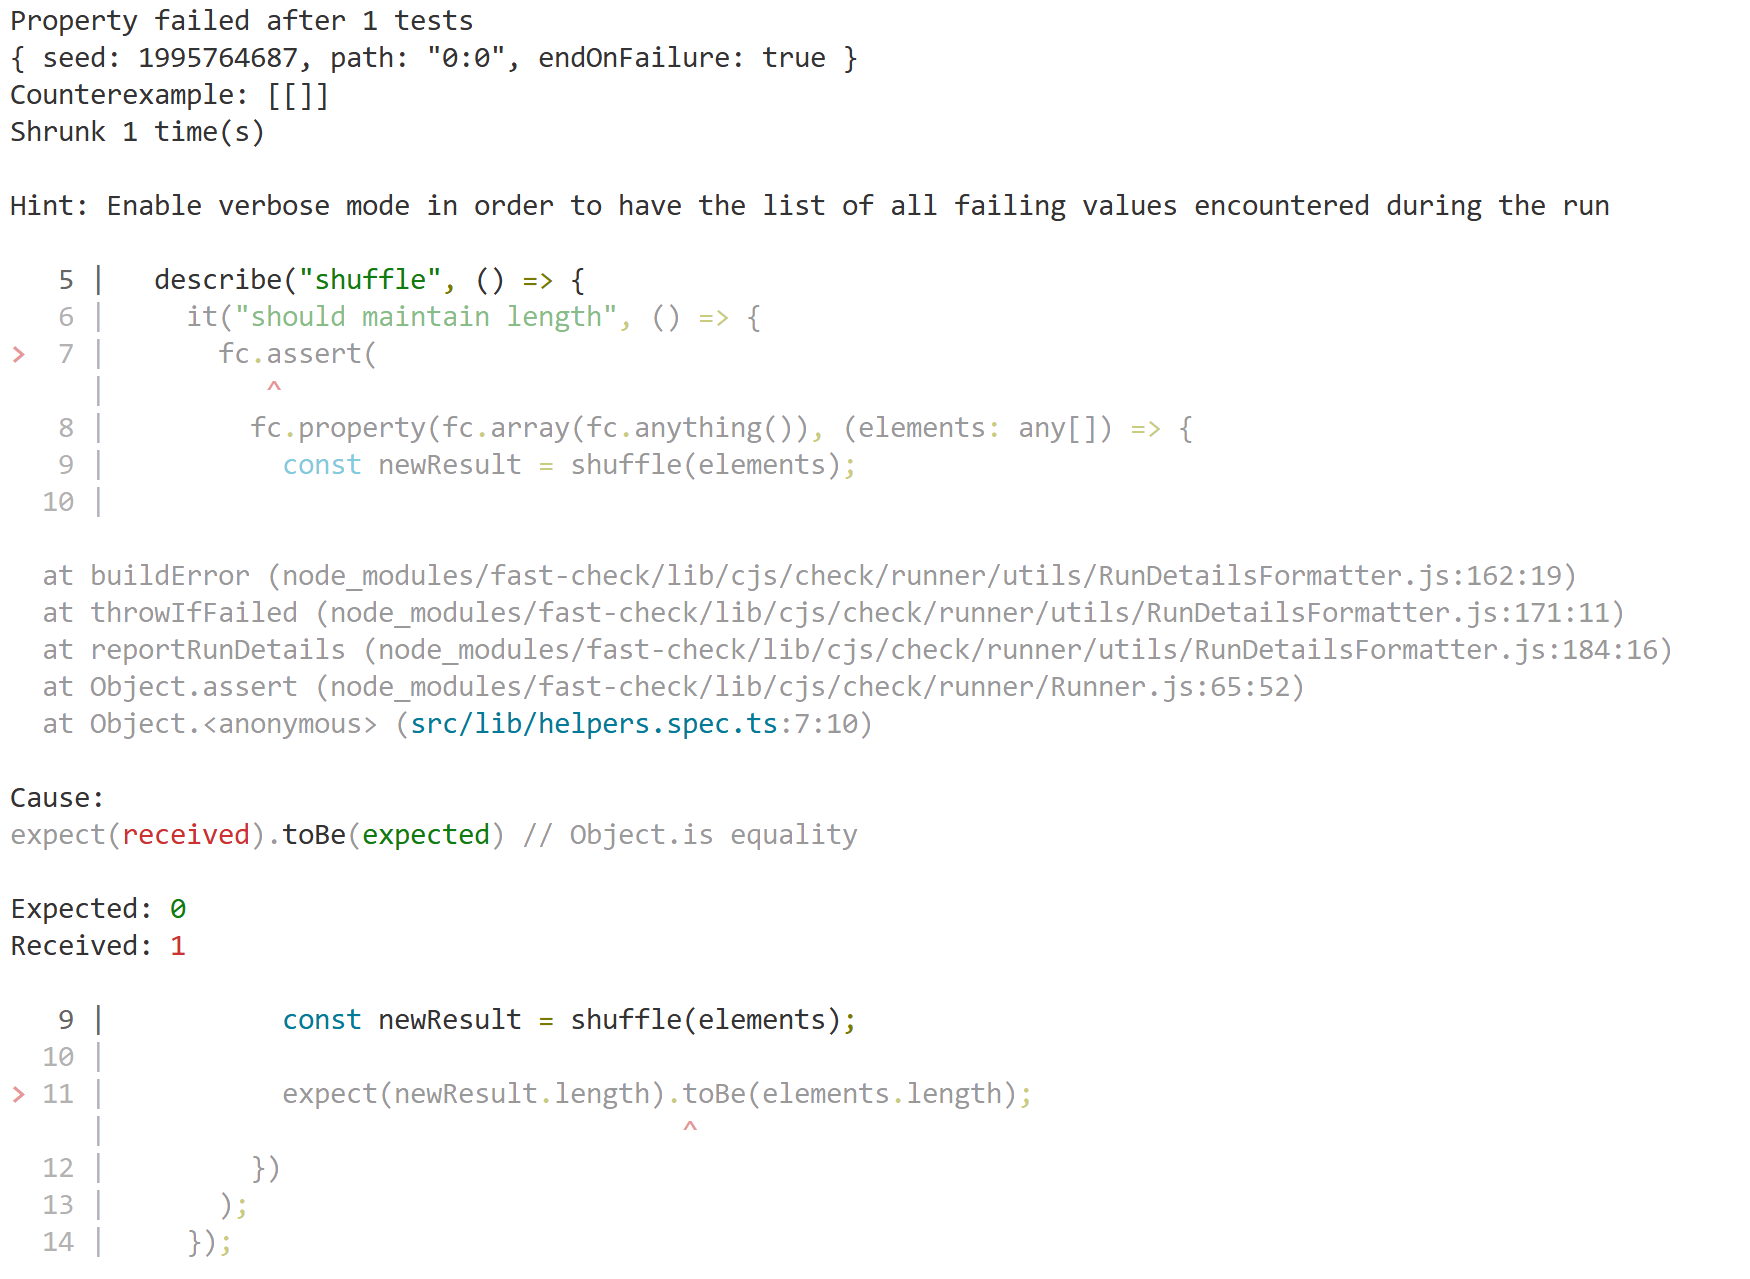
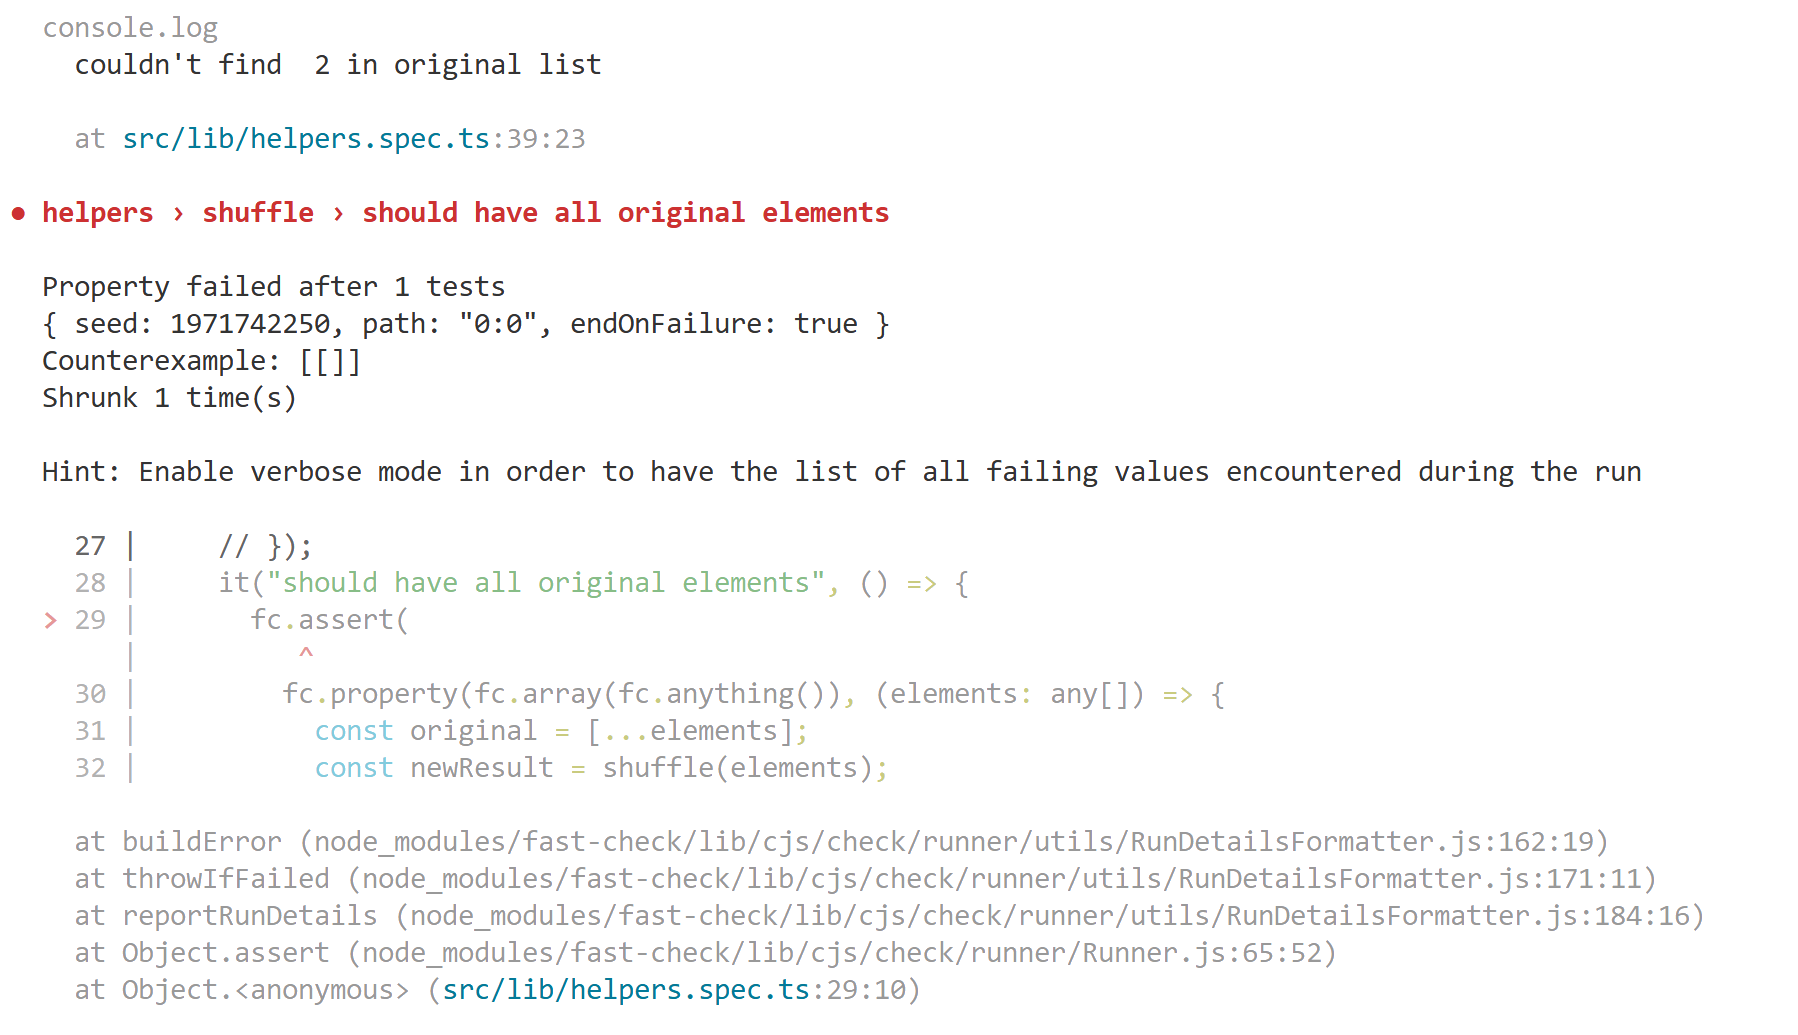
At this point, we could go ahead and start writing tests to verify that our model is being updated given the command, but our users are going to be interacting with the application, so let's build that out next.

From before, we know that the View function takes in the model (a number) and it will return a Command. Given that we need to interact with the user, this is an impure function by design, so we shouldn't put our business rules in here.

public static Command<CommandType> View(int model) {
  Console.WriteLine($"Counter: {model}");
  Console.WriteLine("(I)ncrement, (D)ecrement, (R)eset, or (Q)uit");

  return ConvertStringToCommand(Console.ReadLine());
}

// Even though this is called by the View
// function, this is a Pure function
// because it only depends upon a string
// for its logic
private static Command<CommandType> ConvertStringToCommand(string s) {
  return (s ?? "").Trim().ToLower() switch {
    "i" => new IncrementCommand(2), // will increment by 2
    "d" => new DecrementCommand(1), // will decrement by 1
    "r" => new ResetCommand(),
    "q" => new QuitCommand(),
    _ => new UnknownCommand()
  };
}

Wiring Everything Together

Now that we have our Model (a number), the View function, an Update function, and our list of Commands, we can wire everything together.

public static class Framework
{
  public static void Run<TModel, TCommandType>(
      Func<TModel, Command<TCommandType>> view,
      Func<TModel, Command<TCommandType>, TModel> update,
      TModel model)
  where TCommandType : Enum
  {
    // We need the Enum to have a Quit option
    // defined, otherwise, we won't know when
    // to quit the application.
    if (!Enum.IsDefined(typeof(TCommandType), "Quit"))
    {
      throw new InvalidOperationException("Command must have a Quit option");
    }
    var quitCommand = Enum.Parse(typeof(TCommandType), "Quit");

    // Getting our initial state
    var currentModel = model;
    Command<TCommandType> command;

    // While command isn't Quit
    do
    {
      // Clear the screen
      Console.Clear();
      // Get the command from when we render the view
      command = view(currentModel);
      // Get the new model from update
      currentModel = update(currentModel, command);
    } while (!command.Tag.Equals(quitCommand));
  }
}

Final Version

With the Framework.Run function defined, we can invoke it via our Program.cs file.

You can find the working version below (or you can clone a copy from GitHub)

Program.cs
internal class Program
{
  private static void Main(string[] args)
  {
    var startCounter = 0;
    Framework.Run(View, CounterRules.Update, startCounter);
  }

  public static Command<CommandType> View(int model)
  {
    Console.WriteLine("Counter: " + model);
    Console.WriteLine("Please enter a command:");
    Console.WriteLine("(I)ncrement, (D)ecrement, (R)eset, (Q)uit");
    var input = Console.ReadLine() ?? "";
    return ConvertStringToCommand(input);
  }

  private static Command<CommandType> ConvertStringToCommand(string s) => (s ?? "").ToLower().Trim() switch
  {
    "i" => new IncrementCommand(2),
    "d" => new DecrementCommand(1),
    "r" => new ResetCommand(),
    "q" => new QuitCommand(),
    _ => new UnknownCommand(),
  };
}
CounterRules.cs
public static class CounterRules
{
  public static int Update(int model, Command<CommandType> c)
  {
    return c.Tag switch
    {
      CommandType.Increment => model + (c as IncrementCommand)!.Value,
      CommandType.Decrement => model - (c as DecrementCommand)!.Value,
      CommandType.Reset => 0,
      CommandType.Quit => model,
      CommandType.Unknown => model,
      _ => model
    };
  }
}
Commands.cs
public enum CommandType
{
  Increment,
  Decrement,
  Reset,
  Quit,
  Unknown
}

public class IncrementCommand : Command<CommandType>
{
  public override CommandType Tag => CommandType.Increment;
  public int Value { get; init; }
  public IncrementCommand(int value)
  {
    Value = value;
  }
}

public class DecrementCommand : Command<CommandType>
{
  public override CommandType Tag => CommandType.Decrement;
  public int Value { get; init; }
  public DecrementCommand(int value)
  {
    Value = value;
  }
}

public class ResetCommand : Command<CommandType>
{
  public override CommandType Tag => CommandType.Reset;
}

public sealed class QuitCommand : Command<CommandType>
{
  public override CommandType Tag => CommandType.Quit;
}

public sealed class UnknownCommand : Command<CommandType>
{
  public override CommandType Tag => CommandType.Unknown;
}
Framework.cs
public abstract class Command<T> where T : Enum
{
  public abstract T Tag { get; }
}

public static class Framework
{
  public static void Run<TModel, TCommandType>(
      Func<TModel, Command<TCommandType>> view,
      Func<TModel, Command<TCommandType>, TModel> update,
      TModel model)
  where TCommandType : Enum
  {
    if (!Enum.IsDefined(typeof(TCommandType), "Quit"))
    {
      throw new InvalidOperationException("Command must have a Quit option");
    }
    var quitCommand = Enum.Parse(typeof(TCommandType), "Quit");
    var currentModel = model;
    Console.Clear();
    var command = view(currentModel);
    do
    {
      currentModel = update(currentModel, command);
      Console.Clear();
      command = view(currentModel);
    } while (!command.Tag.Equals(quitCommand));
  }
}

Conclusion

In this post, we built out a basic application using the Model View Update pattern that was first introduced by the Elm language. We also implemented a basic sum type, Command, using an abstract class that was then constrained to particular CommandTypes.

Testing Non Deterministic Code - Debugging Shuffle with Property Based Testing

Background

Now that I've gotten a handle on my work situation, I've been focusing my time to complete work on my upcoming Functional Blackjack course. I've gotten the business rules implemented so I've been playing some games to make sure everything is working the way I'd expect.

For example, here's what the UI looks like for when the game is dealt out.

Console output of a game of blackjack with a dealer and four players

So far, so good. However, every now then, I'd see error messages like this one where I'd be trying to calculate the score of a null card.

Console output of a function failing because an object was null

Doing some digging, I discovered that when I was creating my player, they could have a null card!

Console output of a player object with a hand array property where one of the elements is null

What could be happening? I'm leveraging functional programming techniques (immutable data structures, pure functions for business rules). Given that it doesn't happen all the time, it must be in some of my side-effect code. Combine that thought with the fact the game would break upon start, I had an idea of what might be the cause.

Identifying Possible Problem

In order to create a player, we need to have an id (some arbitrary number) and two cards. These cards are coming from the deck, so let's take a deeper look at how that's being created.

// Deck type
export type Deck = {
  tag: "deck";
  value: Card[];
};

export function create(): Deck {
  const cards: Card[] = [];
  for (const r of getRanks()) {
    for (const s of getSuits()) {
      // build up the card type
      const card:Card = {rank:r, suit:s};
      // add it to the list
      cards.push(card);
    }
  }

  // return the deck shuffled
  return { tag: "deck", value: shuffle(cards) };
}

So far, so good. the first section is building all possible combinations of Rank/Suit to model the deck. The only thing that is suspect is the shuffle function, so let's take a look at it.

1
2
3
4
5
6
7
8
9
// Implementation of Fisher-Yates algorithm (see https://en.wikipedia.org/wiki/Fisher%E2%80%93Yates_shuffle#Modern_method)
export function shuffle<T>(ts: T[]): T[] {
  const copy = [...ts];
  for (let i = copy.length; i > -1; i--) {
    const j = Math.floor(Math.random() * i);
    [copy[j], copy[i]] = [copy[i], copy[j]];
  }
  return copy;
}

Hmm, I don't see anything obviously wrong, however, I've got a hunch this is the problem because it's leveraging Math.random() which would explain why sometimes it works and sometimes it doesn't. Since Math.random() looks at the system clock, this isn't a pure function, so shuffle can't be a pure function (which makes sense, if shuffle always gave the same output for the same input, then we'd clean house, right :) )

My first instinct is to write some unit tests on this function. But how would you unit test shuffle? You could write a test case easily enough for an empty list and a list of one item, however, things get messy once you try to work around Math.random.

Let's try a different approach, using a property testing approach.

Verifying the Problem Using Property Based Testing

Instead of thinking in concrete terms (given this specific input, I should get this specific output), let's think about what properties a properly shuffled array would have.

  1. Should maintain length (i.e. if we shuffle an array of 10 elements, we should have 10 elements back)
  2. Should contain all original items (i.e. if we shuffle the numbers 1-10, then we shouldn't have an 11 or null in the array)

Implementing Maintains Length Property

Using the fast-check library, we can start modeling the first property:

import fc from "fast-check"; // brining in the fast-check library

describe("shuffle", () => {
    it("should maintain length", () => {

      // Fast Check assert
      fc.assert(
        // that for any array of any elements, 
        fc.property(fc.array(fc.anything()), (elements: any[]) => {
          const result = shuffle(elements);

          // the length of the shuffled result should be the same length as elements
          expect(result.length).toBe(elements.length);
        })
      );
    });
});

Seems simple enough, let's see what we get:

Failing test where when given the example of an array with a single element of an empty array, it fails

Whelp, that was easy enough, let's tweak our shuffle function to make that property pass:

1
2
3
4
5
6
7
8
9
export function shuffle<T>(ts: T[]): T[] {
  const copy = [...ts];
  // note that we tweaked i to start from length-1 instead of length
  for (let i = copy.length - 1; i > -1; i--) {
    const j = Math.floor(Math.random() * i);
    [copy[j], copy[i]] = [copy[i], copy[j]];
  }
  return copy;
}

Running the test suite again, we get a passing run, hooray!

Implementing Must Have All Original Items Property

With the first property written up, let's take a shot at writing the second property. For this test, we need to keep track of the original elements before they were shuffled up.

it("should have all original elements", () => {
  fc.assert(
    fc.property(fc.array(fc.anything()), (elements: any[]) => {
      // keeping the items in array called original
      const original = [...elements];

      const result = shuffle(elements);
    })
  );
});

Next, we need to go through each element of result and remove it from the original array. If we find an item that can't be removed, we should fail the test. Otherwise, we can remove it from original.

it("should have all original elements", () => {
  fc.assert(
    fc.property(fc.array(fc.anything()), (elements: any[]) => {
      const original = [...elements];

      const result = shuffle(elements);

      for (const x of result) {
        const foundIndex = original.findIndex((y) => y === x);
        // If we found the item
        if (foundIndex !== -1) {
          // let's remove it
          original.splice(foundIndex, 1);
        } else {
          // otherwise we found an item that shouldn't have been there, 
          // so let's log the failure and fail the test
          console.log("couldn't find ", x, "in original list");
          expect(true).toBeFalsy();
        }
      }
    })
  );
});

Note: Astute readers might have noticed we're not asserting that the original array is empty after the for loop. Since we have the test that verifies that we're maintaining length, that check is not needed here.

Running the test suite, it looks like everything is passing. So to make sure that our test would catch issues, let's inject a bug into the shuffle algorithm!

export function shuffle<T>(ts: T[]): T[] {
  const copy = [...ts];
  for (let i = copy.length - 1; i > -1; i--) {
    const k = Math.floor(Math.random() * i);
    [copy[k], copy[i]] = [copy[i], copy[k]];
  }
  // casting 2 as any makes TypeScript cool with this code
  copy.push(2 as any);
  return copy;
}

If we run the test now, we get the following:

console log message stating that 2 was not in the original list

Based on the tests and the code change that we made, I'm feeling confident that my bug was found and has been solved.

Wrapping Up

In this post, we looked at an issue I was dealing with in my codebase (a mysterious introduction of null). From there, we were able to narrow down to a possible culprit, the shuffle function as it's not a pure function. Using fast check and property testing principals we were able to derive two properties that shuffle should follow and then encode that logic.

The next time you find yourself needing to write tests and are struggling with good inputs, try thinking about properties instead!

Running Single File TypeScript in 5.9 with ts-node and tsx

On July 31, 2025, Microsoft released the next version of TypeScript, v5.9 (click here for full release notes)

One of the changes that caught my attention is what the default tsconfig.json looks like when you leverage npx tsc --init.

Before 5.9, when you ran npx tsc --init, you would get a default tsconfig.json that had all the options outlined with most of them commented, but you could see what their default values would be.

What Changed?

In this release, two changes were made to the tsconfig.json

  • Instead of all the options being shown, now a subset of commonly tweaked settings are generated.
  • There's now a section of recommended settings that have values set.

Before

{
  "compilerOptions": {
    /* Visit https://aka.ms/tsconfig to read more about this file */

    /* Projects */
    // "incremental": true,                              /* Save .tsbuildinfo files to allow for incremental compilation of projects. */
    // "composite": true,                                /* Enable constraints that allow a TypeScript project to be used with project references. */
    // "tsBuildInfoFile": "./.tsbuildinfo",              /* Specify the path to .tsbuildinfo incremental compilation file. */
    // "disableSourceOfProjectReferenceRedirect": true,  /* Disable preferring source files instead of declaration files when referencing composite projects. */
    // "disableSolutionSearching": true,                 /* Opt a project out of multi-project reference checking when editing. */
    // "disableReferencedProjectLoad": true,             /* Reduce the number of projects loaded automatically by TypeScript. */

    /* Language and Environment */
    "target": "es2016",                                  /* Set the JavaScript language version for emitted JavaScript and include compatible library declarations. */
    // "lib": [],                                        /* Specify a set of bundled library declaration files that describe the target runtime environment. */
    // "jsx": "preserve",                                /* Specify what JSX code is generated. */
    // "libReplacement": true,                           /* Enable lib replacement. */
    // "experimentalDecorators": true,                   /* Enable experimental support for legacy experimental decorators. */
    // "emitDecoratorMetadata": true,                    /* Emit design-type metadata for decorated declarations in source files. */
    // "jsxFactory": "",                                 /* Specify the JSX factory function used when targeting React JSX emit, e.g. 'React.createElement' or 'h'. */
    // "jsxFragmentFactory": "",                         /* Specify the JSX Fragment reference used for fragments when targeting React JSX emit e.g. 'React.Fragment' or 'Fragment'. */
    // "jsxImportSource": "",                            /* Specify module specifier used to import the JSX factory functions when using 'jsx: react-jsx*'. */
    // "reactNamespace": "",                             /* Specify the object invoked for 'createElement'. This only applies when targeting 'react' JSX emit. */
    // "noLib": true,                                    /* Disable including any library files, including the default lib.d.ts. */
    // "useDefineForClassFields": true,                  /* Emit ECMAScript-standard-compliant class fields. */
    // "moduleDetection": "auto",                        /* Control what method is used to detect module-format JS files. */

    /* Modules */
    "module": "commonjs",                                /* Specify what module code is generated. */
    // "rootDir": "./",                                  /* Specify the root folder within your source files. */
    // "moduleResolution": "node10",                     /* Specify how TypeScript looks up a file from a given module specifier. */
    // "baseUrl": "./",                                  /* Specify the base directory to resolve non-relative module names. */
    // "paths": {},                                      /* Specify a set of entries that re-map imports to additional lookup locations. */
    // "rootDirs": [],                                   /* Allow multiple folders to be treated as one when resolving modules. */
    // "typeRoots": [],                                  /* Specify multiple folders that act like './node_modules/@types'. */
    // "types": [],                                      /* Specify type package names to be included without being referenced in a source file. */
    // "allowUmdGlobalAccess": true,                     /* Allow accessing UMD globals from modules. */
    // "moduleSuffixes": [],                             /* List of file name suffixes to search when resolving a module. */
    // "allowImportingTsExtensions": true,               /* Allow imports to include TypeScript file extensions. Requires '--moduleResolution bundler' and either '--noEmit' or '--emitDeclarationOnly' to be set. */
    // "rewriteRelativeImportExtensions": true,          /* Rewrite '.ts', '.tsx', '.mts', and '.cts' file extensions in relative import paths to their JavaScript equivalent in output files. */
    // "resolvePackageJsonExports": true,                /* Use the package.json 'exports' field when resolving package imports. */
    // "resolvePackageJsonImports": true,                /* Use the package.json 'imports' field when resolving imports. */
    // "customConditions": [],                           /* Conditions to set in addition to the resolver-specific defaults when resolving imports. */
    // "noUncheckedSideEffectImports": true,             /* Check side effect imports. */
    // "resolveJsonModule": true,                        /* Enable importing .json files. */
    // "allowArbitraryExtensions": true,                 /* Enable importing files with any extension, provided a declaration file is present. */
    // "noResolve": true,                                /* Disallow 'import's, 'require's or '<reference>'s from expanding the number of files TypeScript should add to a project. */

    /* JavaScript Support */
    // "allowJs": true,                                  /* Allow JavaScript files to be a part of your program. Use the 'checkJS' option to get errors from these files. */
    // "checkJs": true,                                  /* Enable error reporting in type-checked JavaScript files. */
    // "maxNodeModuleJsDepth": 1,                        /* Specify the maximum folder depth used for checking JavaScript files from 'node_modules'. Only applicable with 'allowJs'. */

    /* Emit */
    // "declaration": true,                              /* Generate .d.ts files from TypeScript and JavaScript files in your project. */
    // "declarationMap": true,                           /* Create sourcemaps for d.ts files. */
    // "emitDeclarationOnly": true,                      /* Only output d.ts files and not JavaScript files. */
    // "sourceMap": true,                                /* Create source map files for emitted JavaScript files. */
    // "inlineSourceMap": true,                          /* Include sourcemap files inside the emitted JavaScript. */
    // "noEmit": true,                                   /* Disable emitting files from a compilation. */
    // "outFile": "./",                                  /* Specify a file that bundles all outputs into one JavaScript file. If 'declaration' is true, also designates a file that bundles all .d.ts output. */
    // "outDir": "./",                                   /* Specify an output folder for all emitted files. */
    // "removeComments": true,                           /* Disable emitting comments. */
    // "importHelpers": true,                            /* Allow importing helper functions from tslib once per project, instead of including them per-file. */
    // "downlevelIteration": true,                       /* Emit more compliant, but verbose and less performant JavaScript for iteration. */
    // "sourceRoot": "",                                 /* Specify the root path for debuggers to find the reference source code. */
    // "mapRoot": "",                                    /* Specify the location where debugger should locate map files instead of generated locations. */
    // "inlineSources": true,                            /* Include source code in the sourcemaps inside the emitted JavaScript. */
    // "emitBOM": true,                                  /* Emit a UTF-8 Byte Order Mark (BOM) in the beginning of output files. */
    // "newLine": "crlf",                                /* Set the newline character for emitting files. */
    // "stripInternal": true,                            /* Disable emitting declarations that have '@internal' in their JSDoc comments. */
    // "noEmitHelpers": true,                            /* Disable generating custom helper functions like '__extends' in compiled output. */
    // "noEmitOnError": true,                            /* Disable emitting files if any type checking errors are reported. */
    // "preserveConstEnums": true,                       /* Disable erasing 'const enum' declarations in generated code. */
    // "declarationDir": "./",                           /* Specify the output directory for generated declaration files. */

    /* Interop Constraints */
    // "isolatedModules": true,                          /* Ensure that each file can be safely transpiled without relying on other imports. */
    // "verbatimModuleSyntax": true,                     /* Do not transform or elide any imports or exports not marked as type-only, ensuring they are written in the output file's format based on the 'module' setting. */
    // "isolatedDeclarations": true,                     /* Require sufficient annotation on exports so other tools can trivially generate declaration files. */
    // "erasableSyntaxOnly": true,                       /* Do not allow runtime constructs that are not part of ECMAScript. */
    // "allowSyntheticDefaultImports": true,             /* Allow 'import x from y' when a module doesn't have a default export. */
    "esModuleInterop": true,                             /* Emit additional JavaScript to ease support for importing CommonJS modules. This enables 'allowSyntheticDefaultImports' for type compatibility. */
    // "preserveSymlinks": true,                         /* Disable resolving symlinks to their realpath. This correlates to the same flag in node. */
    "forceConsistentCasingInFileNames": true,            /* Ensure that casing is correct in imports. */

    /* Type Checking */
    "strict": true,                                      /* Enable all strict type-checking options. */
    // "noImplicitAny": true,                            /* Enable error reporting for expressions and declarations with an implied 'any' type. */
    // "strictNullChecks": true,                         /* When type checking, take into account 'null' and 'undefined'. */
    // "strictFunctionTypes": true,                      /* When assigning functions, check to ensure parameters and the return values are subtype-compatible. */
    // "strictBindCallApply": true,                      /* Check that the arguments for 'bind', 'call', and 'apply' methods match the original function. */
    // "strictPropertyInitialization": true,             /* Check for class properties that are declared but not set in the constructor. */
    // "strictBuiltinIteratorReturn": true,              /* Built-in iterators are instantiated with a 'TReturn' type of 'undefined' instead of 'any'. */
    // "noImplicitThis": true,                           /* Enable error reporting when 'this' is given the type 'any'. */
    // "useUnknownInCatchVariables": true,               /* Default catch clause variables as 'unknown' instead of 'any'. */
    // "alwaysStrict": true,                             /* Ensure 'use strict' is always emitted. */
    // "noUnusedLocals": true,                           /* Enable error reporting when local variables aren't read. */
    // "noUnusedParameters": true,                       /* Raise an error when a function parameter isn't read. */
    // "exactOptionalPropertyTypes": true,               /* Interpret optional property types as written, rather than adding 'undefined'. */
    // "noImplicitReturns": true,                        /* Enable error reporting for codepaths that do not explicitly return in a function. */
    // "noFallthroughCasesInSwitch": true,               /* Enable error reporting for fallthrough cases in switch statements. */
    // "noUncheckedIndexedAccess": true,                 /* Add 'undefined' to a type when accessed using an index. */
    // "noImplicitOverride": true,                       /* Ensure overriding members in derived classes are marked with an override modifier. */
    // "noPropertyAccessFromIndexSignature": true,       /* Enforces using indexed accessors for keys declared using an indexed type. */
    // "allowUnusedLabels": true,                        /* Disable error reporting for unused labels. */
    // "allowUnreachableCode": true,                     /* Disable error reporting for unreachable code. */

    /* Completeness */
    // "skipDefaultLibCheck": true,                      /* Skip type checking .d.ts files that are included with TypeScript. */
    "skipLibCheck": true                                 /* Skip type checking all .d.ts files. */
  }
}

After

{
  // Visit https://aka.ms/tsconfig to read more about this file
  "compilerOptions": {
    // File Layout
    // "rootDir": "./src",
    // "outDir": "./dist",
    // Environment Settings
    // See also https://aka.ms/tsconfig/module
    "module": "nodenext",
    "target": "esnext",
    "types": [],
    // For nodejs:
    // "lib": ["esnext"],
    // "types": ["node"],
    // and npm install -D @types/node
    // Other Outputs
    "sourceMap": true,
    "declaration": true,
    "declarationMap": true,
    // Stricter Typechecking Options
    "noUncheckedIndexedAccess": true,
    "exactOptionalPropertyTypes": true,
    // Style Options
    // "noImplicitReturns": true,
    // "noImplicitOverride": true,
    // "noUnusedLocals": true,
    // "noUnusedParameters": true,
    // "noFallthroughCasesInSwitch": true,
    // "noPropertyAccessFromIndexSignature": true,
    // Recommended Options
    "strict": true,
    "jsx": "react-jsx",
    // "verbatimModuleSyntax": true,
    "isolatedModules": true,
    "noUncheckedSideEffectImports": true,
    "moduleDetection": "force",
    "skipLibCheck": true,
  }
}

I'm still working through my thoughts on these changes. On one hand, I like the fact that the tsconfig.json is much smaller now and that you can use VS Code to get intellisense on the other options. On the other, if you don't know what you're looking for, it was nice to just see what the options were (with their default values).

Exports Not Working

After setting up a new test application, I tried running my app with ts-node, but got an error with one of my exports.

Error stating that you can't have a top level export when using CommonJS when you have 'verbatimModuleSyntax' set to true

Huh, I'm not familiar with that setting, let's look into it.

At a high level, this setting makes sure that you're not accidentally mixing CommonJS syntax (i.e. using require to access dependencies) with ESModule syntax (i.e. using import to access dependencies).

Finding the Root Cause

Weird, I'm not aware that I'm using CommonJS syntax anywhere, so I wonder where that's coming from. Doing some digging, I find out that there's a type setting you can specify for package.json with the following docs:

Help text from package.json that states if you don't have a type set, the default is commonjs

Ah, yeah, that will do it. So the issue is that by default, when you generate a package.json file, it doesn't create a type setting, so by default, it will be CommonJS.

However, with TypeScript 5.9, the default configuration is assuming ESModule and with the verbatimModuleSyntax being set to true, this breaks our initial set-up scripts.

Migrating to ESModule

Given the docs, the first thing I tried was to set the type setting in the package.json to module.

This fixed my import and now my index file looks like this

1
2
3
4
5
6
7
8
// I wasn't expecting to see an import from `other.js`, but 
// it seems like this is expected behavior (see https://nodejs.org/api/esm.html#mandatory-file-extensions)

import { add } from "./other.js";

const sum = add(2, 3);

console.log(sum);

At this point, I figured I was in a good spot, so I tried npx ts-node src/index.ts again.

However, I was greeted with the following:

Error message from ts-node stating that it doesn't recognize ts files

Fighting with ts-node

What in the world? I've never seen that error before, but doing some more digging into ts-node, it turns out that the issue is that ts-node doesn't know how to load ESModules by default, so you need to get an ESM specific loader to work. The docs mention a few different ways to work around that, so I started trying them out.

No dice, even with trying all of that (and even some help with AI), I still wasn't able to get the TypeScript file to load.

At the end of the day, if I wanted to stick with ts-node, I had to make the following changes.

  • Update the package.json to have a type of commonjs
  • Update the tsconfig.json to set verbatimModuleSyntax to be false
  • Update the import in index to be import {add} from "./other"

This works, however, CommonJS is an old way of setting up files and I don't like that I had to turn off the verbatimModuleSyntax setting.

An Alternative Solution with tsx

Doing more digging, I found an alternative tool to ts-node, [tsx](https://tsx.is/) which purports having a simpler configuration and better support for ESM. This package has been around for a while now, has good support, and is actively maintained, so let's give that a whirl.

npm install --save-dev tsx

After installing tsx, I changed my package.json back to having a type of module and set verbatimModuleSyntax back to its default setting of true.

Let's try to run the file

1
2
3
npx tsx src/index.ts

5
Hooray! I've never been happier to see basic addition working.

Wrapping Up

I've been a big proponent of ts-node for a long-time now due to its easy-to-setup nature and how well it played with TypeScript out of the box. However, with the latest changes to TypeScript, I highly recommend using tsx over ts-node as it just seems to work without having to mess with a bunch of other settings. With the friction I ran into and the direction TypeScript is going, I'll be curious to see how ts-node evolves over time.

Creating a Node Tool With TypeScript and Jest From Scratch

In a previous post, I showed how to create a Node project from scratch. This is a great basis to start building other types of projects, so in this post, I'm going to show you how to build a tool that you can install via npm.

One of my favorite tools to use is gitignore, useful for generating a stock .gitignore file for all sorts of projects.

Let's get started!

Note: Do you prefer learning via video? You can find a version of this article on YouTube

At a high level, we'll be doing the following

  1. Setting the Foundation
  2. Update our project to compiler TypeScript to JavaScript
  3. Update our testing workflow
  4. Set up our executable

Step 0 - Dependencies

For this project, the only tool you'll need is the Long Term Support (LTS) version of Node (as of this post, that's v22, but these instructions should hold regardless). If you're working with different Node applications, then I highly recommend using a tool to help you juggle the different versions of Node you might need (Your options are nvm if you're on Mac/Linux or Node Version Manager for Windows if you're on Windows).

Step 1 - Setting The Foundation

The vast majority of work we need was created as part of build a basic node project, so make sure to complete the steps there first before proceeding!

Step 2 - Compiling TypeScript to JavaScript

In order for another application to use our library, we need to make sure we're shipping JavaScript, not TypeScript. To make that happen, we're going to be using the TypeScript compiler, tsc to help us out.

Telling TypeScript Where To Find Files

When we first setup TypeScript, we created a basic tsconfig.json file and kept the defaults. However, in order to publish a library, we need to set two more compilerOptions in the file.

First, we need to set the outDir property so that our compiled code all goes into a single directory. If we don't do this, our JavaScript files be next to our TypeScript files and that creates a mess.

Second, we need to set the rootDir property so that the TypeScript compiler knows where to search for our code.

Let's go ahead and make those changes in the tsconfig.json file.

1
2
3
4
5
6
7
// existing code
"compilerOptions": {
  // existing code
  "outDir": "dist", // This tells the TypeScript compiler where to put the compiled code at
  "rootDir": "src", // This tells the TypeScript compiler where to search for TypeScript code to compile
}
// existing code

Adding a build script

Now that we've told TypeScript which files to compile and where to put those files, we can update our package.json file with a build script that will invoke the TypeScript compiler, tsc when ran:

1
2
3
4
5
6
7
8
{
  // existing code
  "script":{
    "build": "tsc"
    // existing scripts
  }
  // existing code
}

With this script in place, we can run npm run build from the command line and we'll see that a dist folder was created with some JavaScript files inside.

Improving the Build with Rimraf

Now that we have compilation happening, we need a way to make sure our dist folder is cleaned out before a new compilation as this helps make sure that we don't have old files hanging around. This will also simulate our Continuous Integration pipeline when we start working on that.

We could update our build script with something like rm -rf dist, but that's a Linux command, which most likely won't work on Windows. So let's add a new library, rimraf, that handles removing files in an OS agnostic way.

npm install --save-dev rimraf

After installing, we can update our build script to be the following.

1
2
3
{
  "build": "rimraf dist && tsc"
}

Now, when we run npm run build, we'll see that the dist folder is removed and then recreated.

Step 3 - Updating Jest to Run the Right Files

At this point, we have our TypeScript being compiled into JavaScript, so we're close to being ready to publish our tool. As a sanity check, let's go ahead and run our test suite from step 1

npm run test

Image of jest tests running and it's found two files: index.spec.ts and index.spec.js

Uh oh, it looks like jest is not only running the tests in the src folder, but also in the dist folder. We'll need to tweak our jest.config.js file to ignore the dist folder.

1
2
3
4
5
// existing code
module.exports = {
  //existing code
},
testPathIgnorePatterns: ['dist/'] // this will ignore any matches in the dist folder

If we run our test command again, we'll only see the index.spec.ts file in the listing.

Image of jest tests running and it's found one file: index.spec.ts

Step 4 - Setting up the executable

Adding Bin to Package.json

Now, it's time to tell npm which file to execute as part of the tool.

First, we need to update our package.json file to include a new property bin.

1
2
3
4
5
6
7
{
  // existing code
  "main": "index.js",
  "bin": {
    "nameOfExecutable": "dist/index.js"
  }
}

So if we wanted the name of our tool to be greet, then we would update the "nameOfExecutable" to be greet.

Updating Index With Shebang

If we tried to run our tool now, we'd see that nothing would happen, but the file would be opened in a text editor.

It turns out, that if we don't add a [shebang](https://en.wikipedia.org/wiki/Shebang_(Unix)) to the file, then Node doesn't know that it should execute this file.

So let's update our index.ts file

#!/usr/bin/env node
// rest of the file

Step 5 - Building the Tool

With this final step, we're in a good place to build our tool and try it out.

To create the package, we need to run two commands:

npm run build # This creates a clean folder with our code to deploy
npm pack # This creates a tarball that has our code, which we can execute via npx

Next Steps

With this final step done, we have a great foundation for building out our tool! For example, you could build your own version of [gitignore], maybe a command line interface that wraps around a favorite tool of yours, the sky's the limit!

Creating a Node Project With TypeScript and Jest From Scratch

When teaching engineers about Node, I like to start with the bare bone basics and build from there. Though there is value in using tools to auto-scaffold a project (Vite for React applications, for example), there's also value in understanding how everything hangs together.

In this post, I'm going to show you how to create a Node project from scratch that has TypeScript configured, Jest configured, and a basic test suite in place.

Let's get started!

Note: Do you prefer learning via video? You can find this article on YouTube

Step 0 - Dependencies

For this project, the only tool you'll need is the Long Term Support (LTS) version of Node (as of this post, that's v22, but these instructions should hold regardless). If you're working with different Node applications, then I highly recommend using a tool to help you juggle the different versions of Node you might need (Your options are nvm if you're on Mac/Linux or Node Version Manager for Windows if you're on Windows).

Step 1 - Creating the Directory Layout

A standard project will have a layout like the following:

1
2
3
4
5
6
7
projectName
    \__src # source code for project is here
        \__ index.ts
        \__ index.spec.ts
    \__ package.json
    \__ package.lock.json
    \__ README.md

So let's go ahead and create that. You can do this manually or by running the following in your favorite terminal.

mkdir <projectName> && cd projectName
mkdir src

Step 2 - Setting up Node

With the structure in the right place, let's go ahead and create a Node application. The hallmark sign of a Node app is the package.json file as this has three main piece of info.

  1. What's the name of the application and who created it
  2. What scripts can I execute?
  3. What tools does it need to run?

You can always manually create a package.json file, however, you can generate a standard one by using npm init --yes.

Tip: By specifying the --yes flag, this will generate a file with default settings that you can tweak as needed.

Step 3 - Setting up TypeScript

At this point, we have an application, but there's no code or functionality. Given that we're going to be using TypeScript, we'll need to install some libraries.

Installing Libraries

In the project folder, we're going to install both typescript and a way to execute it, ts-node.

npm install --save-dev typescript ts-node

Note: With Node v24, you can execute TypeScript natively, but there are some limitations. For me, I still like using ts-node for running the application locally.

Setting up TypeScript

Once the libraries have been installed, we need to create a tsconfig.json file. This essentially tells TypeScript how to compile our TypeScript to JavaScript and how much error checking we want during our compilation.

You can always create this file manually, but luckily, tsc (the TypeScript compiler) can generate this for you.

In the project folder, we can run the following

npx tsc --init

Writing Our First TypeScript File

At this point, we have TypeScript configured, but we still don't have any code. This is when I'll write a simple index.ts file that leverages TypeScript and then try to run it with ts-node.

In the src folder, let's create an index.ts file write the following code.

1
2
3
4
5
export function add(a:number, b:number): number {
  return a+b;
}

console.log("add(2,2) =", add(2,2));

This uses TypeScript features (notice the type annotations), which if we try to run this with node, we'll get an error.

Using ts-node To Run File

Let's make sure everything is working by using ts-node.

Back in the terminal, run the following:

npx ts-node src/index.ts

If everything works correctly, you should see the following in the terminal window.

add(2,2) = 4

Adding Our First NPM Script

We're able to run our file, but as you could imagine, it's going to get annoying to always type out npx ts-node src/index.ts. Also, this kills discoverability as you have to document this somewhere (like a README.md) or it'll become a thing that someone "just needs to know".

Let's improve this by adding a script to our package.json file.

Back in setting up node, I mentioned that one of the cool things about package.json is that you can define custom scripts.

A common script to have defined is start, so let's update our package.json with that script.

1
2
3
4
5
6
7
{
  // some code here
  "scripts: {
    "start": "ts-node src/index.ts"
    // other scripts here
  },
}

With this change, let's head back to our terminal and try it out.

npm run start

If everything was setup correctly, we should see the same output as before.

Step 4 - Setting up Jest

At this junction, we can execute TypeScript and made life easier by defining a start script. The next step is that we need to set up our testing framework.

While there are quite a few options out there, a common one is jest so that's what we'll be using in this article.

Since jest is a JavaScript testing library and our code is in TypeScript, we'll need a way to translate our TypeScript to JavaScript. The jest docs mention a few ways of doing this (using a tool like Babel for example). However, I've found using ts-jest to be an easier setup and still get the same outcomes.

Installing Libraries

With our tools selected, let's go ahead and install them.

npm install --save-dev jest ts-jest @types/jest

Note: You might have seen that we're also installing "@types/jest". This does't provide any functionality, however, it does gives us the types that jest uses. Because of that, our code editor can understand @types/jest and give us auto-complete and Intellisense when writing our tests

Configuring Jest

So we have the tools installed, but need to configure them. Generally, you'll need a jest.config.js file which you can hand-write.

Or we can have ts-jest generate that for us :)

npx ts-jest config:init

If this step works, you should have a jest.config.js file in the project directory.

Let's write our first test!

Writing Our First Test

Jest finds tests based on file names. So as long as your test file ends with either .spec.ts, .spec.js, .test.ts, or .test.js, jest will pick it up.

So let's create a new file in the src folder called index.spec.ts and add the following:

import { add } from "./index"
// describe is container for one or more tests
describe("index", () => {
  // it - denotes this is a test
  it("does add work", () => {
    const result = add(2,2);

    expect(result).toBe(4);
  })
})

With our test written, we can run it in the terminal with the following:

npx jest

Adding a Test NPM Script

Just like when we added a custom start script to our package.json file, we can do a similar thing here with our tests.

In package.json, update the scripts section to look like:

1
2
3
4
5
6
7
8
{
  // other code
  "script": {
    "start": "ts-node src/index.ts",
    "test": "jest"
  },
  // other code
}

With this change, we can run our test suite by using npm run test in the terminal.

Congrats, just like that, you have a working Node application with TypeScript and Jest for testing!

Next Steps

With the scaffolding in place, you're in a solid spot to start growing things out. For example, you could...

  • Start setting up a Continuous Integration pipeline
  • Fine-tune your tsconfig.json to enable more settings (like turning off the ability to use any)
  • Fine-tune your jest.config.js (like having your mocks auto-rest)
  • Start writing application code!

Career Update and a New Chapter

A couple of months back, I announced on LinkedIn that some opportunities fell through and I found myself unexpectedly on the market looking for work. It has been a while since I've given an update on what was going on and what I've been up to.

The Search Begins (Anew!)

After watching both opportunities fall through, I began my job search again, leading to me applying to over fifty different companies, focusing on leadership roles (think Team Lead, Engineering Manager, or Director of Engineering). Even though I have quite a few years of recent experience (I've been leading teams in some capacity since 2018), the most common piece of feedback is that it seemed like my recent roles were more technical than leadership.

That's fair feedback as my leadership style is that I wouldn't ask a member of my team to do something that I wouldn't do and I'm naturally curious about how things work, so there are times when I've rolled up my sleeves to help the team get projects done and/or be the technical lead that the team needed.

So, let's try a different approach.

I retooled my resume to highlight my technical accomplishments and applied for more experienced technical roles (think Senior Software Engineer, Staff Software Engineer, Principal Engineer, and Architect). Given the first round of feedback, I figured this would be a shoe-in, right?

Not quite...

Most of the feedback I got for these roles is that I wasn't hands-on technical enough (though my most recent engagements had me coding the vast majority of the time), though my leadership skills were solid.

What Do You Want To Be When You Grow Up?

Not going to lie, it's a bit frustrating to be told that you're too technical for leadership, but not technical enough for engineering, especially when you've helped companies launch new products and new offerings.

My theory (potential cope) is that companies don't know what to do when they find someone who's both a strong technical leader and a strong engineer as they don't come across them that often. Most of the companies I've seen typically want their leadership to be able to understand concepts (i.e., what is continuous deployment pipeline), but not enough to implement or fix it when there are issues. For the engineering side, my experience was that they wanted people who were deep in the technical weeds (we're talking edge cases, knowing the docs cold), but didn't ask a ton about how the work fits into the bigger picture of the business.

For me, I need a combination of both to be happy. I enjoy doing the technical work, building new tools/products to solve problems as I'm great at finding issues with a process and making it smoother.

On the other hand, I thoroughly enjoy leading people and coaching up a team. That was one of the original inspirations for this blog, The Software Mentor, a way to give back and be an (unofficial) mentor to those who don't have someone to level up from.

I can't just ignore one side of the equation, that's throwing away half my strengths.

So what do you do?

In my case, change the game.

A Different Approach

Over my career, I've been lucky to work at quite a few companies and have built great relationships everywhere I went. In addition, I've spent the last ten years building up a reputation in the community as a technical leader (Microsoft MVP since 2017 and have been presenting on technical concepts since 2015).

I figured if I can't get work as an engineer or as a leader, why not try something new.

Back in 2014, some friends and I had started on an ill-fated attempt to build a replacement Point of Sale system to be used by liquor stores (this would have been before tools like Square would become ubiquitous). Though the project never launched, we gave it a name, Small Batch Software as it was both a tip of the cap to small batch distilling and a nod to working in small batches (a la Lean Manufacturing with batch sizes of 1).

We always joked that Small Batch might take off at some point, but we retired the project and the idea of Small Batch was retired (like most ideas go).

Fast forward to 2021, I started taking on some side work, helping other companies with their implementation and process improvement. At the time, I didn't have a formal company, but I started thinking more about forming a company and working through that.

When I left Rocket Mortgage in 2023, I decided to form my own company, Small Batch Solutions LLC to help me with a more formal approach for moonlighting, partly to get some experience and partly to see how it would go.

However, like most things, it was a good idea, but I didn't put the required energy into the company, so it has been mostly dormant since then.

Which brings us to the present.

Small Batch Solutions - Iteration One

After pouring more energy into the company over the past two months, I've had success in landing clients, focusing on what I enjoy doing the most:

  • Mentoring others, helping them advance in their career and technical skills
  • Problem solving, figuring out pain points and solving them simply

Given these successes, I've chosen to focus on Small Batch Solutions full-time, allowing me to continue building with the community and also allowing me to use my strengths without having to fit in a single "box".

If you've ever found yourself thinking, "I wish I could work with someone who just gets it and can help me", then reach out, I think I might be able to help!

Today I Learned - Leveraging Records to Eliminate Switch Statements

The Problem

A common approach is to have a function for each command (moveForward, moveBackward, turnLeft, and turnRight).

When it comes to implementation though, they all have a similar pattern:

function moveForward(r:Rover): Rover {
  switch(r.direction){
    case 'North': return {...r, y:r.y+1};
    case 'South': return {...r, y:r.y-1};
    case 'East': return {...r, x:r.x+1};
    case 'West': return {...r, x:r.x-1};
  }
}

function turnLeft(r:Rover): Rover {
  switch(r.direction){
    case 'North': return {...r, direction:'West'};
    case 'West': return {...r, direction:'South'};
    case 'South': return {...r, direction:'East'};
    case 'East': return {...r, direction:'North'};
  }
}

This works, however, the duplicated switch logic can be annoying to deal with.

During a code review, one of our interns proposed an interesting solution using a dictionary for lookups.

Let's take a closer look.

Possible solution

Instead of leveraging a switch statement, they thought about creating a dictionary where the key was the direction the rover was facing and the value being how to update the rover.

At a high level, it looked something like this:

type Direction = "North" | "South" | "East" | "West";
type Action = (r:Rover) => Rover;
type ActionLookup = Record<Direction, Action>;

function moveForward(r:Rover): Rover {
  const lookup: ActionLookup = {
    "North": (r)=>({...r, y:r.y+1}),
    "South": (r)=>({...r, y:r.y-1}),
    "East": (r)=>({...r, x:r.x+1}),
    "West": (r)=>({...r, x:r.x-1})
  };
  const action = lookup[r.direction];
  return action(r);
}

Even though this looks like a dictionary, I like this approach better for two reasons:

  1. Explicit key coverage - By defining Record to have a key of Direction, we're forcing the developer to define options for every direction, not just some of them.
  2. Breaks when type changes - If a new option is added to Direction, this code won't compile anymore as it doesn't cover every option, which allows us to find bugs faster.

Closing Thoughts

When working with data that requires different access levels, think about leveraging private fields and then providing access through public properties.

Today I Learned - JavaScript Private Fields and Properties

One of my favorite times of year has started, intern season! I always enjoy getting a new group of people who are excited to learn something new and are naturally curious about everything!

As such, one of the first coding katas we complete is Mars Rover as it's a great exercise to introduce union types, records, functions, and some of the basic array operators (map and reduce). It also provides a solid introduction to automated testing practices (Arrange/Act/Assert, naming conventions, test cases). Finally, you can solve it multiple ways and depending on the approach, lends itself to refactoring and cleaning up.

Now my preferred approach to the kata is to leverage functional programming (FP) techniques, however, it wouldn't be correct to only show that approach, so I tackled it using more object-oriented (OO) instead.

One of the things that we run into pretty quickly is that we're going to need a Rover class that will have the different methods for moving and turning. Since the Rover will need to keep track of its X, Y, and Direction, I ended up with the following:

1
2
3
4
5
type Direction = "North" | "South" | "East" | "West";
class Rover {
  constructor(private x:number, private y:number, private direction:Direction){}
  // moveForward, moveBackward, turnLeft, and turnRight definitions below...
}

This approach works just fine as it allows the caller to give us a starting point, but they can't manipulate X, Y, or Direction directly, they have to use one of the methods (i.e., we have encapsulation).

The Problem

However, we run into a slight problem once we get to the user interface. We would like to be able to display the Rover's location and direction, however, we don't have a way of accessing that data since we marked those as private.

In other words, we can't do the following:

const rover = new Rover(0, 0, 'North');
console.log(`Rover is at (${r.x}, ${r.y}) facing ${r.direction}`)

One way to fix this problem is to remove the private modifier and allow the values to be public, however, this would mean that the state of my object could be manipulated either through it's methods (i.e., moveForward) or through global access rover.X = 100.

What I'd like to do instead is to have a way to get the value to the outside world, but not allow them to modify it.

In languages like C#, we would leverage a public get/private set on properties, which would look something like this:

public class Rover 
{
  public int X {get; private set;}
  public int Y {get; private set;}
  public Direction Direction {get; private set;}
  public Rover (int x, int y, Direction direction)
  {
    X = x;
    Y = y;
    Direction = direction;
  }
}

Let's take a look at how we can build the same idea in TypeScript (and by extension, JavaScript)

Introducing Fields

Introducing fields are simple enough, we just define them in the class like so:

1
2
3
4
5
class Rover {
  private x:number;
  private y:number;
  private direction:Direction;
}

However, if you're working in JavaScript, the private keyword doesn't exist. However, JavaScript still allows you to mark something as private by prefixing # to the name.

1
2
3
4
5
class Rover {
  #x;
  #y;
  #direction;
}

With these fields in place, we now update our constructor to explicitly set the values.

In TypeScript

1
2
3
4
5
constructor(x:number, y:number, direction:Direction){
  this.x = x;
  this.y = y;
  this.direction = direction;
}

In JavaScript

1
2
3
4
5
constructor(x, y, direction){
  this.#x = x;
  this.#y = y;
  this.#direction = direction;
}

At this point, we can update the various methods (moveForward, moveBackward, turnLeft, turnRight) to use the fields.

Introducing Properties

With out fields in use, we can now expose their values by defining the get (colloquially known as the getter) for the fields.

In TypeScript

1
2
3
4
5
6
7
8
9
get x(): number {
  return this.x;
}
get y(): number {
  return this.y;
}
get direction(): Direction {
  return this.direction;
}

In JavaScript

1
2
3
4
5
6
7
8
9
get x() {
  return this.#x;
}
get y() {
  return this.#y;
}
get direction() {
  return this.#direction;
}

With our properties in place, the following code will work now

1
2
3
4
5
6
const rover = new Rover(4, 2, 'North');
console.log(`Rover is at (${rover.X}, ${rover.Y}) facing ${rover.Direction})`);
// prints "Rover is at (4, 2) facing North

// But this doesn't work
rover.X = 100; // can't access X

Closing Thoughts

When working with data that requires different access levels, think about leveraging private fields and then providing access through public properties.

Simplifying Console Logic with the Model-View-Update

When I first started dabbling in Functional Programming, a new front-end language called Elm had been released and it was generating a lot of buzz about how it simplified web development by introducing four parts (i.e., The Elm Architecture" (TEA)) that provided a mental model when creating web pages. This way of thinking was so powerful that it inspired popular libraries like Redux and ngrx which took this architecture mainstream.

Spilling the TEA

At a high level, the architecture has four parts:

  1. Model -> What are we rendering?
  2. View -> How do we want to render it?
  3. Update -> Given the current model and a Command, what's the new model?
  4. Command -> What did the user do?

To help make this a bit more clear, let's define some types for these parts and see how they would work together

type Model = any;
type View = (m:Model)=>Promise<Command>;
type Update = (m:Model, c:Command)=>Model;
type Command = "firstOption" | "secondOption" ... | 'quit';

async function main(model:Model, view:View, update:Update): Promise<void>{
  const command = await view(model);
  if (command === 'quit'){
    return;
  }
  const newModel = update(model, command);
  return main(newModel);
}

With some types in play, let's go ahead and build out a small application, a counter (the "Hello World" for Elm).

Building a Counter

First, we need to figure out what the model will be. Since we're only keeping tracking of a number, we can define our model as a number.

type Model = number;

Next, we need to define what the user can do. In this case, they can either increment, decrement, or quit so let's set the command up.

type Command = 'increment' | 'decrement' | 'quit';

Now that we have Command, we can work on the update function. Given the type signature from before, we know its going to look like this:

1
2
3
function update(model:Model, command:Command): Model {
  // logic
}

We can leverage a switch and put in our business rules

1
2
3
4
5
6
7
function update(model:Model, command:Command): Model {
  switch(command){
    case 'increment': return model+1;
    case 'decrement': return model-1;
    case 'quit': return model;
  }
}

Finally, we need to define our view function. Like before, we can get the skeleton for the function based on the types from earlier.

1
2
3
async function view(model:Model): Promise<Command>{

}

Let's update the function with our rendering logic

1
2
3
4
async function view(model:Model): Promise<Command>{
  console.log("Counter:", model);
  console.log("Choose to (i)ncrement, (d)ecrement, or (q)uit");
}

We've got our render up and running, however, we need to get input from the user. Since we're working within Node, we could use readline, however, I've recently been using @inquirer/prompts and find it to be a nice abstraction to use. So let's use that package.

import {input} from "@inquirer/prompts";

async function getChoice(): Promise<Command>{
  console.log("Choose to (i)ncrement, (d)ecrement, or (q)uit");
  const validChoices = ["i", "d", "q"];
  const validator = (s:string) => validChoices.include(s?.trim().toLowerCase());
  const selection = await input({message:message, validate:validator});
  if (selection === "i") {
    return "increment";
  } else if (selection === "d"){
    return "decrement";
  } else {
    return "terminate"
  }
}
// Let's change the view function to use getChoice

async function view(model:Model): Promise<Command>{
  console.log("Counter:", model);
  return getChoice();
}

With these pieces defined, we can use the main function from before.

async function main(model:Model, view:View, update:Update): Promise<void>{
  const command = await view(model);
  if (command === 'quit'){
    return;
  }
  const newModel = update(model, command);
  return main(newModel);
}

// Invoking Main
main(10, view, update);

Starting Back at Zero

Now that we have increment and decrement working, it would be nice to be able to reset the counter without having to restart the application, so let's see how bad that would be.

First, we need to add a new choice to Command (called reset). This will force us to update the rest of the code that's working with Command.

type Command = "increment" | "decrement" | "reset" | "quit";

Next, we need to update the update function so it knows how to handle a reset command. In our case, we need to set the model back to zero.

1
2
3
4
5
6
7
8
function update(model:Model, command:Command): Model {
  switch(command){
    case 'increment': return model+1;
    case 'decrement': return model-1;
    case 'reset': return 0;
    case 'quit': return model;
  }
}

At this point, the application knows how to handle the new Command, however, we need to update our view function to allow the user to select reset.

async function view(model:Model): Promise<Command>{
  console.log("Counter:", model);
  return getChoice();
}

async function getChoice(): Promise<Command>{
  // updating the console.log
  console.log("Choose to (i)ncrement, (d)ecrement, (r)eset, or (q)uit"); 
  const validChoices = ["i", "d", "r", "q"];
  const validator = (s:string) => validChoices.include(s?.trim().toLowerCase());
  const selection = await input({message:message, validate:validator});
  if (selection === "i") {
    return "increment";
  } else if (selection === "d"){
    return "decrement";
  } else if (selection === "r"){
    return "reset";
  } else {
    return "terminate"
  }
}

What's Next?

Now that we have have a working version, you could start implementing some fun functionality. For example, how would you allow someone to set how much to increment or decrement by? What if you needed to keep track of previous values (i.e., maintaining history)? I highly encourage you trying this out with a simple kata (for example, how about giving Mars Rover a try?)

Full Working Solution

import {input} from "@inquirer/prompts";

type Model = number;
type Command = "increment" | "decrement" | "reset" | "quit";
type View = (model:Model) => Promise<Command>;
type Update = (model:Model, command:Command) => Model;

function update(model:Model, command:Command): Model {
  switch(command){
    case "increment": return model+1;
    case "decrement": return model-1;
    case "reset": return 0;
    case "quit": return model;
  }
}

function view(model:Model): Promise<Command>{
  console.log(`Counter:${model}`);
  return getChoice();
}

async function getChoice(): Promise<Command>{
  console.log("Choose to (i)ncrement, (d)ecrement, (r)eset, or (q)uit"); 
  const validChoices = ["i", "d", "r", "q"];
  const validator = (s:string) => validChoices.include(s?.trim().toLowerCase());
  const selection = await input({message:message, validate:validator});
  if (selection === "i") {
    return "increment";
  } else if (selection === "d"){
    return "decrement";
  } else if (selection === "r"){
    return "reset";
  } else {
    return "terminate"
  }
}

async function main(model:Model, view:View, update:Update): Promise<void>{
  const command = await view(model);
  if (command === 'quit'){
    return;
  }
  const newModel = update(model, command);
  return main(newModel, view, update);
}

main(10, view, update);

Leveraging Tuples in TypeScript

In preparation for StirTrek, I'm revisiting my approach for how to implement the game of Blackjack. I find card games to be a great introduction to functional concepts as you hit the major concepts quickly and the use cases are intuitive.

Let's take a look at one of the concepts in the game, Points.

Blackjack is played with a standard deck of cards (13 Ranks and 4 Suits) where the goal is to get the closest to 21 points without going over. A card is worth Points based on its Rank. So let's go ahead and model what we know so far.

1
2
3
type Rank = "Ace" | 2 | 3 | 4 | 5 | 6 | 7 | 8 | 9 | 10 | "Jack" | "Queen" | "King"
type Suit = "Hearts" | "Clubs" | "Spades" | "Diamonds"
type Card = {readonly rank:Rank, readonly suit:Suit}

We know that a Card is worth points based on its rank, the rule are:

  • Cards with a Rank of 2 through 10 are worth that many points (i.e., 2's are worth 2 points, 3's are worth 3 points, ..., 10's are worth 10 points)
  • Cards with a Rank of Jack, Queen, or King are worth 10 points
  • Cards with a Rank of Ace can be worth either 1 or 11 points (depending on which one is the most advantageous)

Let's explore the Ace in more detail.

For example, if we had a hand consisting of an Ace and a King, then it could be worth either 11 (treating the Ace as a 1) or as 21 (treating the Ace as an 11). In this case, we'd want to treat the Ace as an 11 as that gives us 21 exactly (specifically, a Blackjack).

In another example, if we had a hand consisting of an Ace, 6, and Jack, then it could either be worth 17 (treating the Ace as a 1) or 27 (treating the Ace as an 11). Since 27 is greater than 21 (which would cause us to bust), we wouldn't want the Ace to be worth 11.

Creating cardToPoints

Now that we have this detail, let's take a look at trying to write the cardToPoints function.

function cardToPoints(c:Card): Points { // Note we don't know what the type of this is yet
  switch(c.rank) {
    case 'Ace': return ???
    case 'King': return 10;
    case 'Queen': return 10;
    case 'Jack': return 10;
    default:
      return c.rank; // we can do this because TypeScript knows all the remaining options for Rank are numbers
  }
}

At this point, we don't know how to score Ace because we would need to know the other cards to get points for. Since we don't have that context here, why not capture both values?

function cardToPoints(c:Card): Points { // Note we don't know what the type of this is yet
  switch(c.rank) {
    case 'Ace': return [1,11];
    case 'King': return 10;
    case 'Queen': return 10;
    case 'Jack': return 10;
    default:
      return c.rank; // we can do this because TypeScript knows all the remaining options for Rank are numbers
  }
}

In TypeScript, we can denote a tuple by using []. Going forward, TypeScript knows that it's a two element array and guarantees that we can index using 0 or 1.

This works, however, anything using cardToPoints has to deal with that it could either be a number or a tuple.

When I come across cases like this, I reach for setting up a sum type to model each case.

1
2
3
type Hard = {tag:'hard', value:number};
type Soft = {tag:'soft', value:[number,number]}; // note that value here is a tuple of number*number
type Points = Hard | Soft

Now, when I call cardToPoints, I can use the tag field to know whether I'm working with a number or a tuple.

Adding Points Together

A common workflow in Blackjack is to figure out how many points someone has. At a high level, we'd want to do the following

  • Convert each Card to Points
  • Add all the Points together

Summing things together is a common enough pattern, so we know our code is going to look something like this:

1
2
3
function handToPoints(cards:Card[]): Points {
  return cards.map((c)=>cardToPoints(c)).reduce(SOME_FUNCTION_HERE, SOME_INITIAL_VALUE_HERE);
}

We don't have the reducer function defined yet, but we do know that it's a function that'll take two Points and return a Points. So let's stub that out.

1
2
3
function addPoints(a:Points, b:Points): Points {
  // implementation
}

Since we modeled Points as a sum type, we can use the tag field to go over the possible cases

function addPoints(a:Points, b:Points): Points {
  if (a.tag === 'hard' && b.tag === 'hard') {
    // logic
  }
  if (a.tag === 'hard' && b.tag === 'soft'){
    // logic
  }
  if (a.tag === 'soft' && b.tag === 'hard'){
    // logic
  } 
  // last case is both of them are soft
}

With this skeleton in place, let's start implementing each of the branches

Adding Two Hard Values

The first case is the easiest, if we have two hard values, then we add their values together. So a King and 7 us a 17 for example.

1
2
3
4
function addHardAndHard(a:Hard, b:Hard): Points { // note that I'm defining a and b as Hard and not just Points
  const value = a.value + b.value;
  return {tag:'hard', value};
}

With this function defined, we can update addPoints like so

1
2
3
4
5
6
function addPoints(a:Points, b:Points): Points {
  if (a.tag === 'hard' && b.tag === 'hard'){
    return addHardAndHard(a,b);
  }
  // other branches
}

Adding Hard and Soft

The next two cases are the same, where we're adding a Hard value to a Soft value. For example, we're adding a 6 to an Ace. We can't assume that the answer is 7 since that might not be what the player wants. We also can't assume that the value is 17 because that might not be to the players advantage, which means that we need to keep track of both options, which implies that the result would be a Soft value. Let's go ahead and write that logic out

1
2
3
4
function addHardAndSoft(a:Hard, b:Soft): Points { // note that a is typed to be Hard and b is typed as Soft
  const [bLow, bHigh] = b.value; // destructuring the tuple into specific pieces
  return {tag:'soft', value:[a.value+bLow, a.value+bHigh]};
}

With this function in place, we can write out the next two branches

function addPoints(a:Points, b:Points): Points {
  if (a.tag === 'hard' && b.tag === 'hard'){
    return addHardAndHard(a, b);
  }
  if (a.tag === 'hard' && b.tag === 'soft'){
    return addHardAndSoft(a, b);
  }
  if (a.tag === 'soft' && b.tag === 'hard'){
    return addHardAndSoft(b, a); 
  }
  // remaining logic
}

Adding Soft and Soft

The last case we need to handle is when both Points are Soft. If we were to break this down, we have four values (aLow, aHIgh for a, and bLow,bHigh for b) we need to keep track of:

  1. aLow + bLow
  2. aHigh + bLow
  3. aLow + bHigh
  4. aHigh + bHigh

However, let's play around with this by assuming that Points in question are both Ace. We would get the following:

  1. aLow + bLow = 1 + 1 = 2
  2. aHigh + bLow = 11 + 1 = 12
  3. aLow + bHigh = 1 + 11 = 12
  4. aHigh + bHigh = 11 + 11 = 22

Right off the bat, we can discard the case 4, (aHigh + bHigh), because there is no situation where the player would want that score as they would bust.

For cases 2 and 3, they yield the same value, so they're essentially the same case.

Which means, that our real cases are

  1. aLow + bLow
  2. aHigh + bLow (which is the same as aLow + bHigh)

So let's go ahead and write that function

1
2
3
4
5
function addSoftAndSoft(a:Soft, b:Soft): Points {
  const [aLow, aHigh] = a.value;
  const [bLow] = b.value; // note that we're only grabbing the first element of the tuple here
  return {tag:'soft', value:[aLow+bLow, aHigh+bLow]};
}

Which gives us the following for addPoints

function addPoints(a:Points, b:Points): Points {
  if (a.tag === 'hard' && b.tag === 'hard'){
    return addHardAndHard(a, b);
  }
  if (a.tag === 'hard' && b.tag === 'soft'){
    return addHardAndSoft(a, b);
  }
  if (a.tag === 'soft' && b.tag === 'hard'){
    return addHardAndSoft(b, a);
  }
  return addSoftAndSoft(a as Soft, b as Soft);
}

Now that we have addPoints, let's revisit handToPoints

1
2
3
4
5
6
7
8
// Original Implementation
// function handToPoints(cards:Card[]): Points {
//   return cards.map((c)=>cardToPoints(c)).reduce(SOME_FUNCTION_HERE, SOME_INITIAL_VALUE_HERE;
// }

function handToPoints(cards:Card[]): Points {
  return cards.map((c)=>cardToPoints(c)).reduce(addPoints, SOME_INITIAL_VALUE_HERE);
}

Now we need to figure out what SOME_INITIAL_VALUE_HERE would be. When working with reduce, a good initial value would be what would we return if we had no cards in the hand? Well, they would have 0 points, right? We can use 0, but we can't just return 0 since our function returns Points, so we need to go from 0 to Points. Easy enough, we can use Hard to accomplish this.

1
2
3
4
5
6
7
function handToPoints(cards:Card[]): Points {
  const initialValue:Points = {tag:'hard', value:0};
  return cards.map((c)=>cardToPoints(c)).reduce(addPoints, initialValue);
}

const hand = [{rank:'Ace', suit:'Hearts'}, {rank:7, suit:'Clubs'}]
console.log(handToPoints(hand)); // {tag:'soft', value:[8, 18]};

For those who know a bit of category theory, you might notice that addPoints is the operation and Hard 0 is the identity for a monoid over Points.

One Last Improvement

So this code works and everything is fine, however, we can make one more improvement to addPoints. Let's take a look at what happens when we try to get the Points for the following:

1
2
3
4
5
6
7
8
const hand: Card[] = [
  {rank:'Ace', suit:'Diamonds'},
  {rank:8, suit:'Hearts'},
  {rank:4, suit:'Clubs'},
  {rank:8, suit:'Spades'}
]

console.log(handToPoints(hand)); // {tag:'soft', value:[21, 31]};

Huh, we got the right value, but we know that for Soft, it doesn't make sense to allow the player a choice between 21 and 31 because 31 is always invalid. Even though the answer isn't wrong per se, it does allow the user to do the wrong thing later on, which isn't the greatest.

Let's add one more function, normalize that will check to see if the Points is Soft with a value over 21. If so, we convert to a Hard and throw out the value over 21. Otherwise we return the value (since it's possible for someone to get a Hard score over 21).

function normalize(p:Points): Points {
  if (p.tag === 'soft' && p.value[1] > 21){
    return {tag:'hard', value:p.value[0]}
  }
  return p;
}

// updated addPoints with normalize being used
function addPoints(a:Points, b:Points): Points {
  if (a.tag === 'hard' && b.tag === 'hard'){
    return normalize(addHardAndHard(a, b));
  }
  if (a.tag === 'hard' && b.tag === 'soft'){
    return normalize(addHardAndSoft(a, b));
  }
  if (a.tag === 'soft' && b.tag === 'hard'){
    return normalize(addHardAndSoft(b, a));
  }
  return normalize(addSoftAndSoft(a as Soft, b as Soft));
}

// Note: There's some minor refactoring that we could do here (for example, creating an internal function for handling the add logic and updating `addPoints` to use that function with normalize),
// but will leave that as an exercise to the reader :)

Wrapping Up

In this post, we took a look at using tuples in TypeScript by tackling a portion of the game of Blackjack. Whether it's through using it in types (like we did for Soft) or for destructuring values (like we did in the various addX functions), they can be a handy way of grouping data together for short-term operations.

Interested in knowing more?

If you've enjoyed the above, then you might be interested in my new course (launching Summer 2025) where we build out the game of Blackjack using these concepts in TypeScript. Click here if you're interested in getting an update for when the course goes live!