Creating a Node Tool With TypeScript and Jest From Scratch
In a previous post, I showed how to create a Node project from scratch. This is a great basis to start building other types of projects, so in this post, I'm going to show you how to build a tool that you can install via npm.
One of my favorite tools to use is gitignore, useful for generating a stock .gitignore file for all sorts of projects.
Let's get started!
Note: Do you prefer learning via video? You can find a version of this article on YouTube
At a high level, we'll be doing the following
- Setting the Foundation
- Update our project to compiler TypeScript to JavaScript
- Update our testing workflow
- Set up our executable
Step 0 - Dependencies
For this project, the only tool you'll need is the Long Term Support (LTS) version of Node (as of this post, that's v22, but these instructions should hold regardless). If you're working with different Node applications, then I highly recommend using a tool to help you juggle the different versions of Node you might need (Your options are nvm if you're on Mac/Linux or Node Version Manager for Windows if you're on Windows).
Step 1 - Setting The Foundation
The vast majority of work we need was created as part of build a basic node project, so make sure to complete the steps there first before proceeding!
Step 2 - Compiling TypeScript to JavaScript
In order for another application to use our library, we need to make sure we're shipping JavaScript, not TypeScript. To make that happen, we're going to be using the TypeScript compiler, tsc to help us out.
Telling TypeScript Where To Find Files
When we first setup TypeScript, we created a basic tsconfig.json file and kept the defaults. However, in order to publish a library, we need to set two more compilerOptions in the file.
First, we need to set the outDir property so that our compiled code all goes into a single directory. If we don't do this, our JavaScript files be next to our TypeScript files and that creates a mess.
Second, we need to set the rootDir property so that the TypeScript compiler knows where to search for our code.
Let's go ahead and make those changes in the tsconfig.json file.
Adding a build script
Now that we've told TypeScript which files to compile and where to put those files, we can update our package.json file with a build script that will invoke the TypeScript compiler, tsc when ran:
With this script in place, we can run npm run build from the command line and we'll see that a dist folder was created with some JavaScript files inside.
Improving the Build with Rimraf
Now that we have compilation happening, we need a way to make sure our dist folder is cleaned out before a new compilation as this helps make sure that we don't have old files hanging around. This will also simulate our Continuous Integration pipeline when we start working on that.
We could update our build script with something like rm -rf dist, but that's a Linux command, which most likely won't work on Windows. So let's add a new library, rimraf, that handles removing files in an OS agnostic way.
After installing, we can update our build script to be the following.
Now, when we run npm run build, we'll see that the dist folder is removed and then recreated.
Step 3 - Updating Jest to Run the Right Files
At this point, we have our TypeScript being compiled into JavaScript, so we're close to being ready to publish our tool. As a sanity check, let's go ahead and run our test suite from step 1
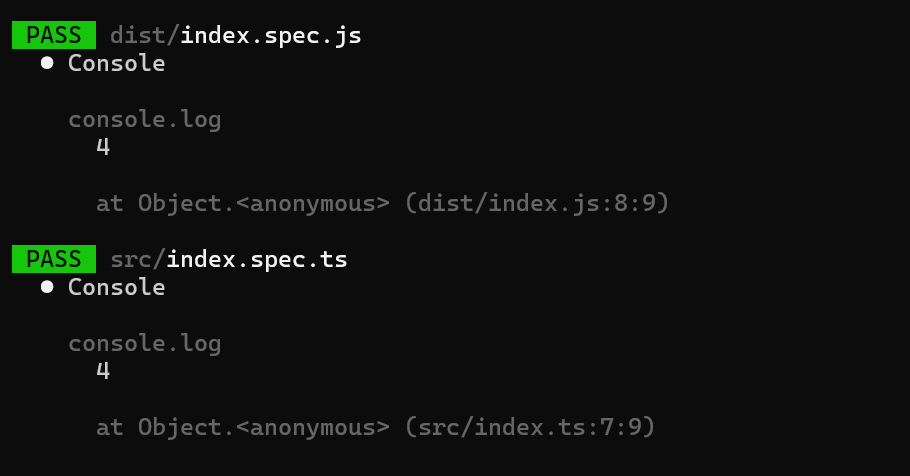
Uh oh, it looks like jest is not only running the tests in the src folder, but also in the dist folder. We'll need to tweak our jest.config.js file to ignore the dist folder.
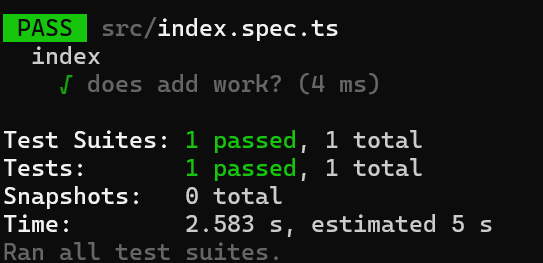
If we run our test command again, we'll only see the index.spec.ts file in the listing.
Step 4 - Setting up the executable
Adding Bin to Package.json
Now, it's time to tell npm which file to execute as part of the tool.
First, we need to update our package.json file to include a new property bin.
So if we wanted the name of our tool to be greet, then we would update the "nameOfExecutable" to be greet.
Updating Index With Shebang
If we tried to run our tool now, we'd see that nothing would happen, but the file would be opened in a text editor.
It turns out, that if we don't add a [shebang](https://en.wikipedia.org/wiki/Shebang_(Unix)) to the file, then Node doesn't know that it should execute this file.
So let's update our index.ts file
Step 5 - Building the Tool
With this final step, we're in a good place to build our tool and try it out.
To create the package, we need to run two commands:
Next Steps
With this final step done, we have a great foundation for building out our tool! For example, you could build your own version of [gitignore], maybe a command line interface that wraps around a favorite tool of yours, the sky's the limit!