Welcome to the second installment of our Deno series, where we build a script that pairs up people for coffee.
In the last post, we built a script that helped the Justice League meet up for coffee.
As of right now, our script looks like the following.
| index.ts |
|---|
| const names = [
"Batman",
"Superman",
"Green Lantern",
"Wonder Woman",
"Static Shock", // one of my favorite DC heroes!
"The Flash",
"Aquaman",
"Martian Manhunter",
];
const pairs = createPairsFrom(shuffle(names));
const message = createMessage(pairs);
console.log(message);
function shuffle<T>(items: T[]): T[] {
const result = [...items];
for (let i = result.length - 1; i > 0; i--) {
const j = Math.floor(Math.random() * i);
[result[i], result[j]] = [result[j], result[i]];
}
return result;
}
type Pair<T> = { first: T; second: T; third?: T };
function createPairsFrom<T>(items: T[]): Pair<T>[] {
if (items.length < 2) {
return [];
}
const results = [];
for (let i = 0; i <= items.length - 2; i += 2) {
const pair: Pair = { first: items[i], second: items[i + 1] };
results.push(pair);
}
if (items.length % 2 === 1) {
results[results.length - 1].third = items[items.length - 1];
}
return results;
}
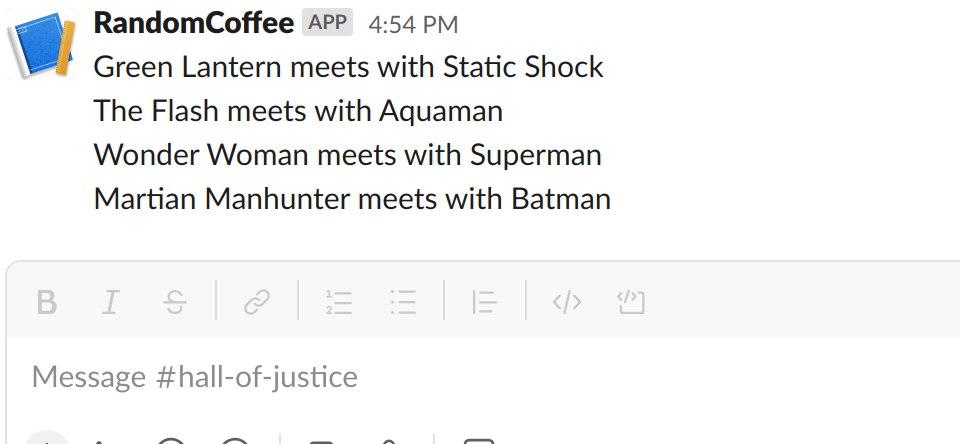
function createMessage(pairs: Pair<string>[]): string {
const mapper = (p: Pair<string>) =>
`${p.first} meets with ${p.second}${p.third ? ` and ${p.third}` : ""}`;
return pairs.map(mapper).join("\n");
}
|
Even though this approach works, the major problem is that every time there's a member change in the Justice League (which seems to happen more often than not), we have to go back and update the list manually.
It'd be better if we could get this list dynamically instead. Given that the League are great developers, they have their own GitHub organization. Let's work on integrating with GitHub's API to get the list of names.
To get the list of names from GitHub, we'll need to do the following.
- First, we need to figure out which GitHub endpoint will give us the members of the League. This, in turn, will also tell us what permissions we need for our API scope.
- Now that we have a secret, we need to update our script to read from an
.env file.
- Once we have the secret being read, we can create a function to retrieve the members of the League.
- Miscellaneous refactoring of the main script to handle a function returning complex types instead of strings.

Before we start, we should reactor our current file. It works, but we have a mix of utility functions (shuffle and createPairsFrom) combined with presentation functions (createMessage). Let's go ahead and move shuffle and createPairsFrom to their own module.
| utility.ts |
|---|
| type Pair<T> = { first: T; second: T; third?: T };
function shuffle<T>(items: T[]): T[] {
const result = [...items];
for (let i = result.length - 1; i > 0; i--) {
const j = Math.floor(Math.random() * i);
[result[i], result[j]] = [result[j], result[i]];
}
return result;
}
function createPairsFrom<T>(items: T[]): Pair<T>[] {
if (items.length < 2) {
return [];
}
const results: Pair<T>[] = [];
for (let i = 0; i <= items.length - 2; i += 2) {
const pair: Pair<T> = { first: items[i], second: items[i + 1] };
results.push(pair);
}
if (items.length % 2 === 1) {
results[results.length - 1].third = items[items.length - 1];
}
return results;
}
export { createPairsFrom, shuffle };
export type { Pair };
|
With these changes, we can update index.ts to be:
| index.ts |
|---|
| import { Pair, createPairsFrom, shuffle } from "./module.ts";
const names = [
  "Batman",
  "Superman",
  "Green Lantern",
  "Wonder Woman",
  "Static Shock", // one of my favorite DC heroes!
  "The Flash",
  "Aquaman",
  "Martian Manhunter",
];
const pairs = createPairsFrom(shuffle(names));
const message = createMessage(pairs);
console.log(message);
function createMessage(pairs: Pair<string>[]): string {
  const mapper = (p: Pair<string>) =>
    `${p.first} meets with ${p.second}${p.third ? ` and ${p.third}` : ""}`;

  return pairs.map(mapper).join("\n");
}
|
Now that our code is more tidy, we can focus on figuring out which GitHub endpoint(s) to use to figure out the members of the Justice League.
Taking a look at the docs, we see that there are two different options.
- Get members of an Organization
- Get members of a Team
What's the difference between the two? In GitHub parlance, an Organization is an overarching entity that consists of members which, in turn, can be part of multiple teams.
Using the Justice League as an example, it's an organization that contains Batman, and Batman can be part of the Justice League Founding Team and a member of the Batfamily Team.
Since we want to pair everyone up in the Justice League, we'll use the Get members of an Organization approach.
To interact with the endpoint, we'll need to create an API token for GitHub. Looking over the docs, our token needs to have the read:org scope. We can create this token by following the instructions here about creating a Personal Auth Token (PAT).
Once we have the token, we can invoke the endpoint with cURL or Postman to verify that we can communicate with the endpoint correctly.
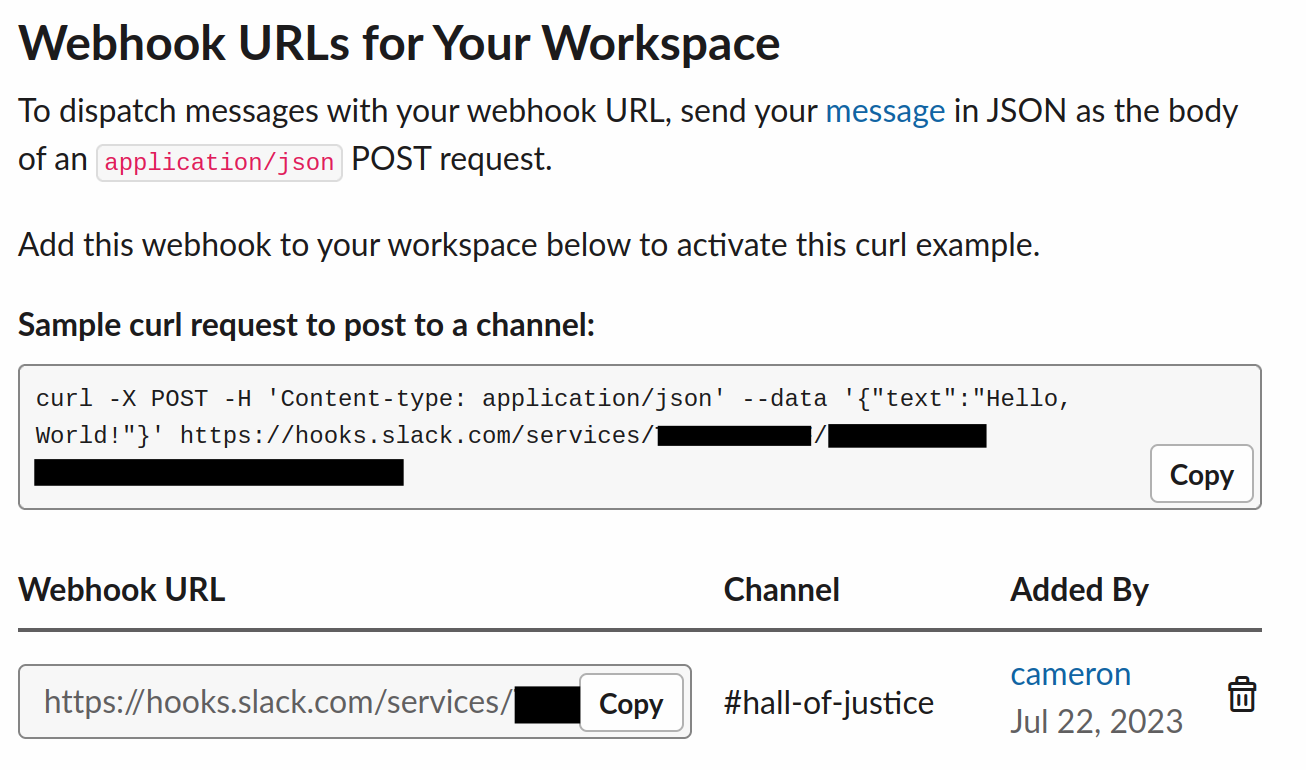
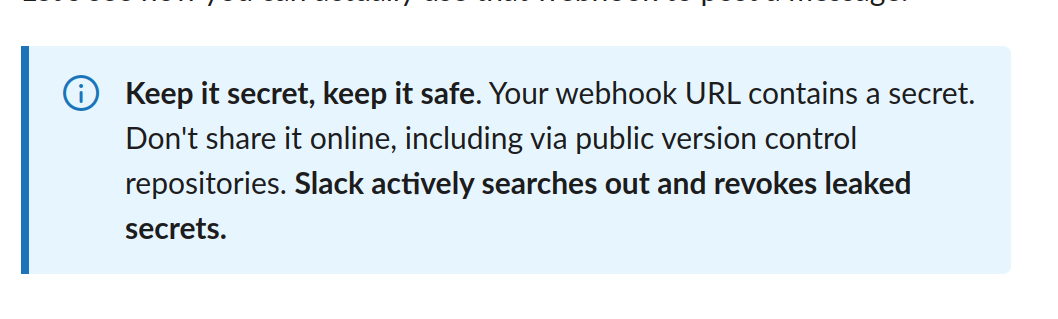
After we've verified, we'll need a way to get this API token into our script. Given that this is sensitive information, we absolutely should NOT check this into the source code.
A common way of dealing with that is to use an .env file which doesn't get checked in, but our application can use it during runtime to get secrets.
Let's go ahead and create the .env file and put our API token here.
| .env |
|---|
| GITHUB_BEARER_TOKEN="INSERT_TOKEN_HERE"
|
Our problem now is that if we check git status, we'll see this file listed as a change. We don't want to check this in, so let's add a .gitignore file.
With the .env file created, we need to create a .gitignore file, which tells Git not to check in certain files.
Let's go ahead and add the file. You can enter the below, or you can use the Node gitignore file (found here)
| .gitignore |
|---|
| .env # ignores all .env files in the root directory
|
We can validate that we've done this correctly if we run git status and don't see .env showing up anymore as a changed file.
Now that we have the file created, we need to make sure that this file loads at runtime.
In our index.ts file, let's make the following changes.
| index.ts |
|---|
| import { config as loadEnv } from "https://deno.land/x/dotenv@v3.2.2/mod.ts";
// other imports
// This loads the .env file and adds them to the environment variable list
await loadEnv({ export: true });
// Deno.env.get("name") retrieves the value from an environment variable named "name"
console.log(Deno.env.get("GITHUB_BEARER_TOKEN"));
// remaining code
|
When we run the script now with deno run, we get an interesting prompt:
Deno requests read access to ".env".
- Requested by `Deno.readFileSync()` API.
- Run again with --allow-read to bypass this prompt
- Allow?
This is one of the coolest parts about Deno; it has a security system that prevents scripts from doing something that you hadn't intended through its Permissions framework.
For example, if you weren't expecting your script to read from the env file, it'll prompt you to accept. Since packages can be taken over and updated to do nefarious things, this is a terrific idea.
The permissions can be tuned (e.g., you're only allowed to read from the .env file), or you can give blanket permissions. In our cases, two resources are being used (the ability to read the .env file and the ability to read the GITHUB_BEARER_TOKEN environment variable).
Let's run the command with the allow-read and allow-env flags.
deno run --allow-run --allow-env ./index.ts
If the bearer token gets printed, we've got the .env file created correctly and can proceed to the next step.
Now that we have the bearer token, we can work on calling the GitHub Organization endpoint to retrieve the members.
Since this is GitHub related, we should create a new file, github.ts, to host our functions and types.
In the github.ts file, we're going to be use axiod for communication. It's similar to axios in Node and is better than then the built-in fetch API.
Let's go ahead and bring in the import.
| github.ts |
|---|
| import axiod from "https://deno.land/x/axiod@0.26.2/mod.ts";
|
With axiod pulled in, let's write the function to interact with the GitHub API.
| github.ts |
|---|
| // Brining in the axiod library
import axiod from "https://deno.land/x/axiod@0.26.2/mod.ts";
async function getMembersOfOrganization(orgName: string): Promise<any[]> {
const url = `https://api.github.com/orgs/${orgName}/members`;
// Necessary headers are found on the API docs
const headers = {
Accept: "application/vnd.github+json",
Authorization: `Bearer ${Deno.env.get("GITHUB_BEARER_TOKEN")}`,
"X-GitHub-Api-Version": "2022-11-28",
};
try {
const resp = await axiod.get<any[]>(url, {
headers: headers,
});
return resp.data;
} catch (error) {
// Response was received, but non-2xx status code
if (error.response) {
return Promise.reject(
`Failed to get members: ${error.response.status}, ${error.response.statusText}`
);
} else {
// Response wasn't received
return Promise.reject(
"Failed for non status reason " + JSON.stringify(error)
);
}
}
}
|
To prove this is working, we can call this function in the index.ts file and verify that we're getting a response.
| index.ts |
|---|
| import { config as loadEnv } from "https://deno.land/x/dotenv@v3.2.2/mod.ts";
import { getMembersOfOrganization } from "./github.ts";
import { Pair, createPairsFrom, shuffle } from "./utility.ts";
await loadEnv({ export: true });
const membersOfOrganization = await getMembersOfOrganization("JusticeLeague");
console.log(JSON.stringify(membersOfOrganization));
// rest of the file
|
Now let's rerun the script.
| deno run --allow-read --allow-env ./main.ts
|
Deno requests net access to "api.github.com"
- Requested by `fetch` API.
- Run again with --allow-net to bypass this prompt.
Ah! Our script is now doing something new (making network calls), so we'll need to allow that permission by using the --allow-net flag.
| deno run --allow-read --allow-env --allow-net ./main.ts
|
If everything has worked, you should see a bunch of JSON printed to the screen. Success!
At this point, we're making the call, but we're using a pesky any for the response, which works, but it doesn't help us with what properties we have to work with.
Looking at the response schema, it seems the main field we need is login. So let's go ahead and create a type that includes that field.
| github.ts |
|---|
| type GetOrganizationMemberResponse = {
login: string;
};
async function getMembersOfOrganization(
orgName: string
): Promise<GetOrganizationMemberResponse[]> {
//code
const resp = await axiod.get<GetOrganizationMemberResponse[]>(url, {
headers: headers,
});
// rest of the code
}
|
We can rerun our code and verify that everything is still working, but now with better type safety.
Now that we have this function written, we can work to integrate it with our index.ts script.
| index.ts |
|---|
| import { config as loadEnv } from "https://deno.land/x/dotenv@v3.2.2/mod.ts";
import { getMembersOfOrganization } from "./github.ts";
import { Pair, createPairsFrom, shuffle } from "./utility.ts";
await loadEnv({ export: true });
const names = await getMembersOfOrganization("JusticeLeague");
const pairs = createPairsFrom(shuffle(names));
const message = createMessage(pairs);
console.log(message);
|
So far, so good. The only change we had to make was to replace the hardcoded array of names with the call to getMembersOfOrganization.
Not an issue, right?
Hmmm, what's up with this?
It looks like createMessage is expecting Pair<string>[], but is receiving Pair<GetOrganizationMemberResponse>[].
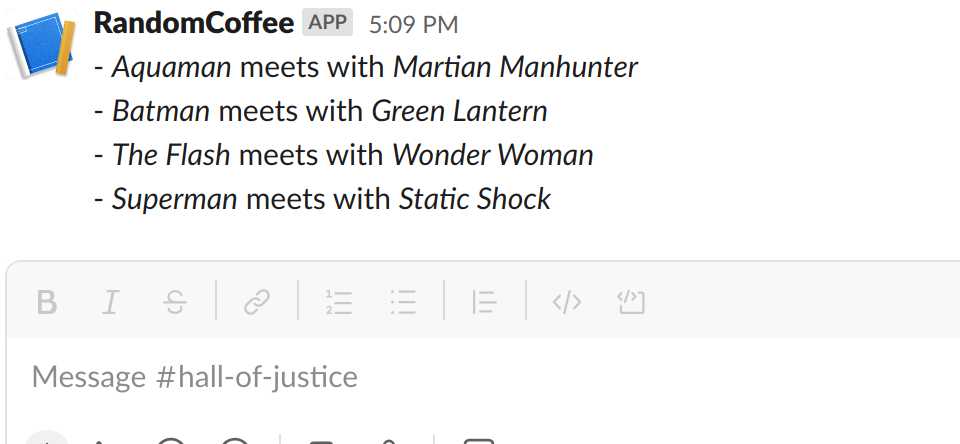
To solve this problem, we'll modify createMessage to work with GetOrganizationMemberResponse.
| index.ts |
|---|
| // Need to update the input to be Pair<GetOrganizationMemberResponse>
function createMessage(pairs: Pair<GetOrganizationMemberResponse>[]): string {
// Need to update mapper function to get the login property
const mapper = (p: Pair<string>): string =>
`${p.first.login} meets with ${p.second.login}${
p.third ? ` and ${p.third.login}` : ""
}`;
return pairs.map(mapper).join("\n");
}
|
With this last change, we run the script and verify that we're getting the correct output, huzzah!
Congratulations! We now have a script that is dynamically pulling in heroes from the Justice League organization instead of always needing to see if Green Lantern is somewhere else or if another member of Flash's SpeedForce is here for the moment.
A working version of the code can be found on GitHub.