There are few fundamental truths in life, one of which is that the only consistent thing is change. Whether that's through a reorganization, someone leaving the team, or the start of a new initiative, we know that what happens today is different from yesterday, and as a leader, the team is looking to you to figure out how to navigate these changes.
In this post, I'll share some tips and tricks for leading the team through change.
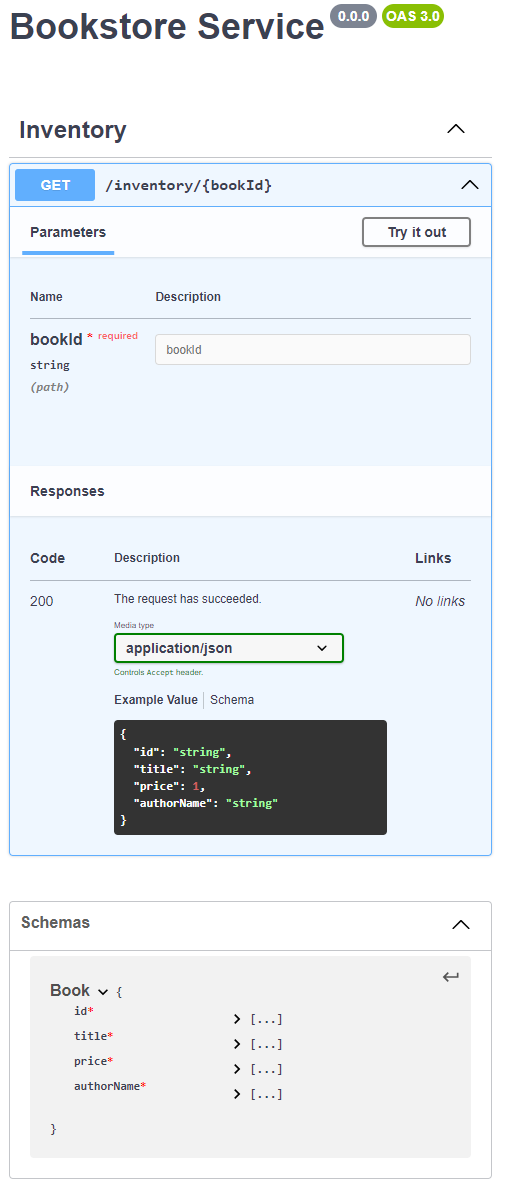
A common mistake I see leaders make is introducing a change without discussing why the change is happening. Let's look at a hypothetical situation where you're introducing the team to pull request templates.
Hey team! Starting next sprint, we're going to start using this new PR template. You can find it ....
On the one hand, the message is clear on what's changing (using new PR template). However, it completely missed the point, why are we making this change? When we don't include the why, we catch people off-guard because they may not immediately understand the problem that the change is supposed to solve.
When we put people in an information vacuum, they draw their own conclusions, which can give the wrong impression behind the change. This in turn, can cause the rumor mill to go into overdrive, making your job much harder.
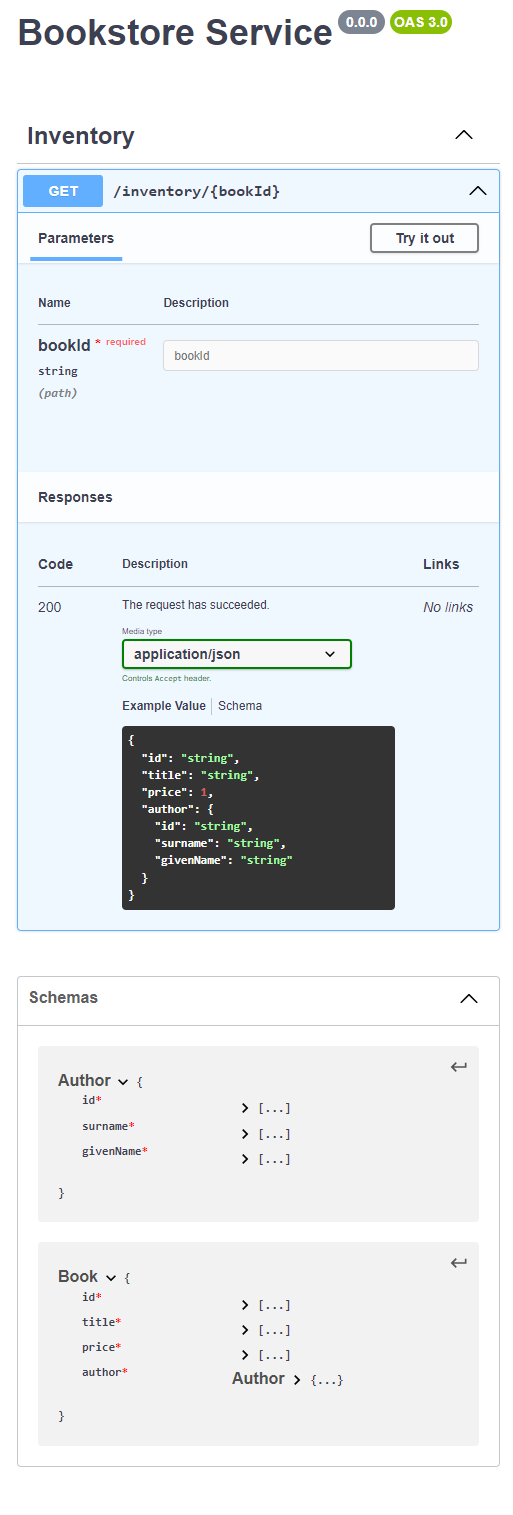
Let's revisit the same scenario but include the "why" this time.
Hey team! During our last retro, it was brought up that our pull requests descriptions aren't consistent, which makes reviewing them more difficult. To help build consistency, we're going to start using pull request templates. You can find it ....
By making this small change, we can squash misinformation and potential rumor mills because we're clear on the reasoning.
Which is a great segue to...
When explaining the reason, don't lie or sugarcoat the reasoning, even if it makes you feel uncomfortable. Your team is smart and they'll know if you're lying to them.
A hot topic nowadays are Return to Office (RTO) plans, with a common reason being "need more in-person collaboration." Even though this provides a "why," it's not backed by metrics or anything measurable. In addition, in-person doesn't necessarily mean more collaboration.
A better approach is to use employee engagement surveys or customer satisfaction surveys to measure the effectiveness of team or company. If you can't use these metrics (or other relevant metrics), then why are you introducing this change?
Going back to our hypothetical RTO, let's say that the reason we're going back to the office is that we're a start-up whose investors have already paid for our space. To them, having people in the space helps them feel better that their money is well spent (in addition, some companies have a tax break if they moved to your state as long as they have a percentage of people on-site).
This is what you should be telling your team. They may not like the reason and they might disagree, but they know the why and then they can make their own decisions. Long story short, you're giving them the autonomy to make their own decisions because they have all the information.
Humans don't have perfect memories, right? So why would we expect that once we introduce a change that's the last time we need to talk about it?
Regardless of the change, don't be surprised if you need to mention it 3 or 4 times before people finally start understanding and applying the change. A great mentor of mine once told me that he would tell people about the change time and time again until it stuck. While this was happening, he would show patience, repeat the messaging, and answer questions and concerns.
When we hear of change, our first step is start processing the message and the immediate impacts. Some people will have questions immediately while others need time to stew on it.
Because of this, be available to answer questions as they come up (even if you've already answered them before). Be prepared for questions during one-on-ones, after meetings, or whenever they come up.
Acknowledge the questions and answer them. If you don't know the answer, tell them that you don't know and that you're going to find the answer.
Don't be surprised that your team exhibits a wide range of emotions for more significant changes.
For example, if your company is doing layoffs, then it's reasonable for people to be upset, depressed, or mentally checked out.
When this happens, you have to give people space to process. This doesn't mean isolating them but being aware that they need some time and accommodate accordingly.
A common mistake I see leaders make here is introducing a change, thinking it was low impact, so they start making other changes. In reality, this change had a high impact, and now the team is under pressure to handle the original change and whatever new commitments are coming their way.
Not only does this reduce your odds of success, but this prevents your team from dealing with the changes, which can turn into stress or frustration. If this happens enough times, people will change teams (or even jobs) just to get a change of scenery and be able to process.
Even though changes are going to happen, do not introduce one change this week, another next week, and then one more two weeks later.
As engineers, we learned that refactoring a codebase should be done in small steps to prevent functionality from breaking.
While this works great for code, this is terrible advice for humans.
When frequent changes happen, it becomes difficult to get into a rhythm with the work and the team, reducing the effectiveness of the team.
When we get changes happening like this, it becomes difficult to get into a rhythm with the work and the team. Especially if large changes keep happening every few weeks.
In the current landscape, we're seeing companies go through multiple rounds of layoffs. While this may keep them out of the news (no one reports that a company laid off ten people, even if it's the fourth time it's happened this year), it causes a feeling of dread for the survivors, as now they're thinking when they'll be next.
Instead of having multiple layoffs, if companies had one (albeit larger) layoff, this would allow people to have time to adjust and proceed without as much paranoia.
Navigating change is hard - especially when you aren't just going through the change yourself, but also leading others at the same time.
The next time you're going through a change, try starting here and see how it goes
- Explain the "why" behind the change.
- Be transparent about the changes, even if it's uncomfortable.
- Be mindful that everyone processes change differently and may feel a greater impact or need more time to recover from teh change.
By starting here, your chances of moving forward without significant disruption will improve dramatically.